DIY Pikler Triangle Slide - How to build a $200 slide from scratch

Building a Pikler Triangle Slide
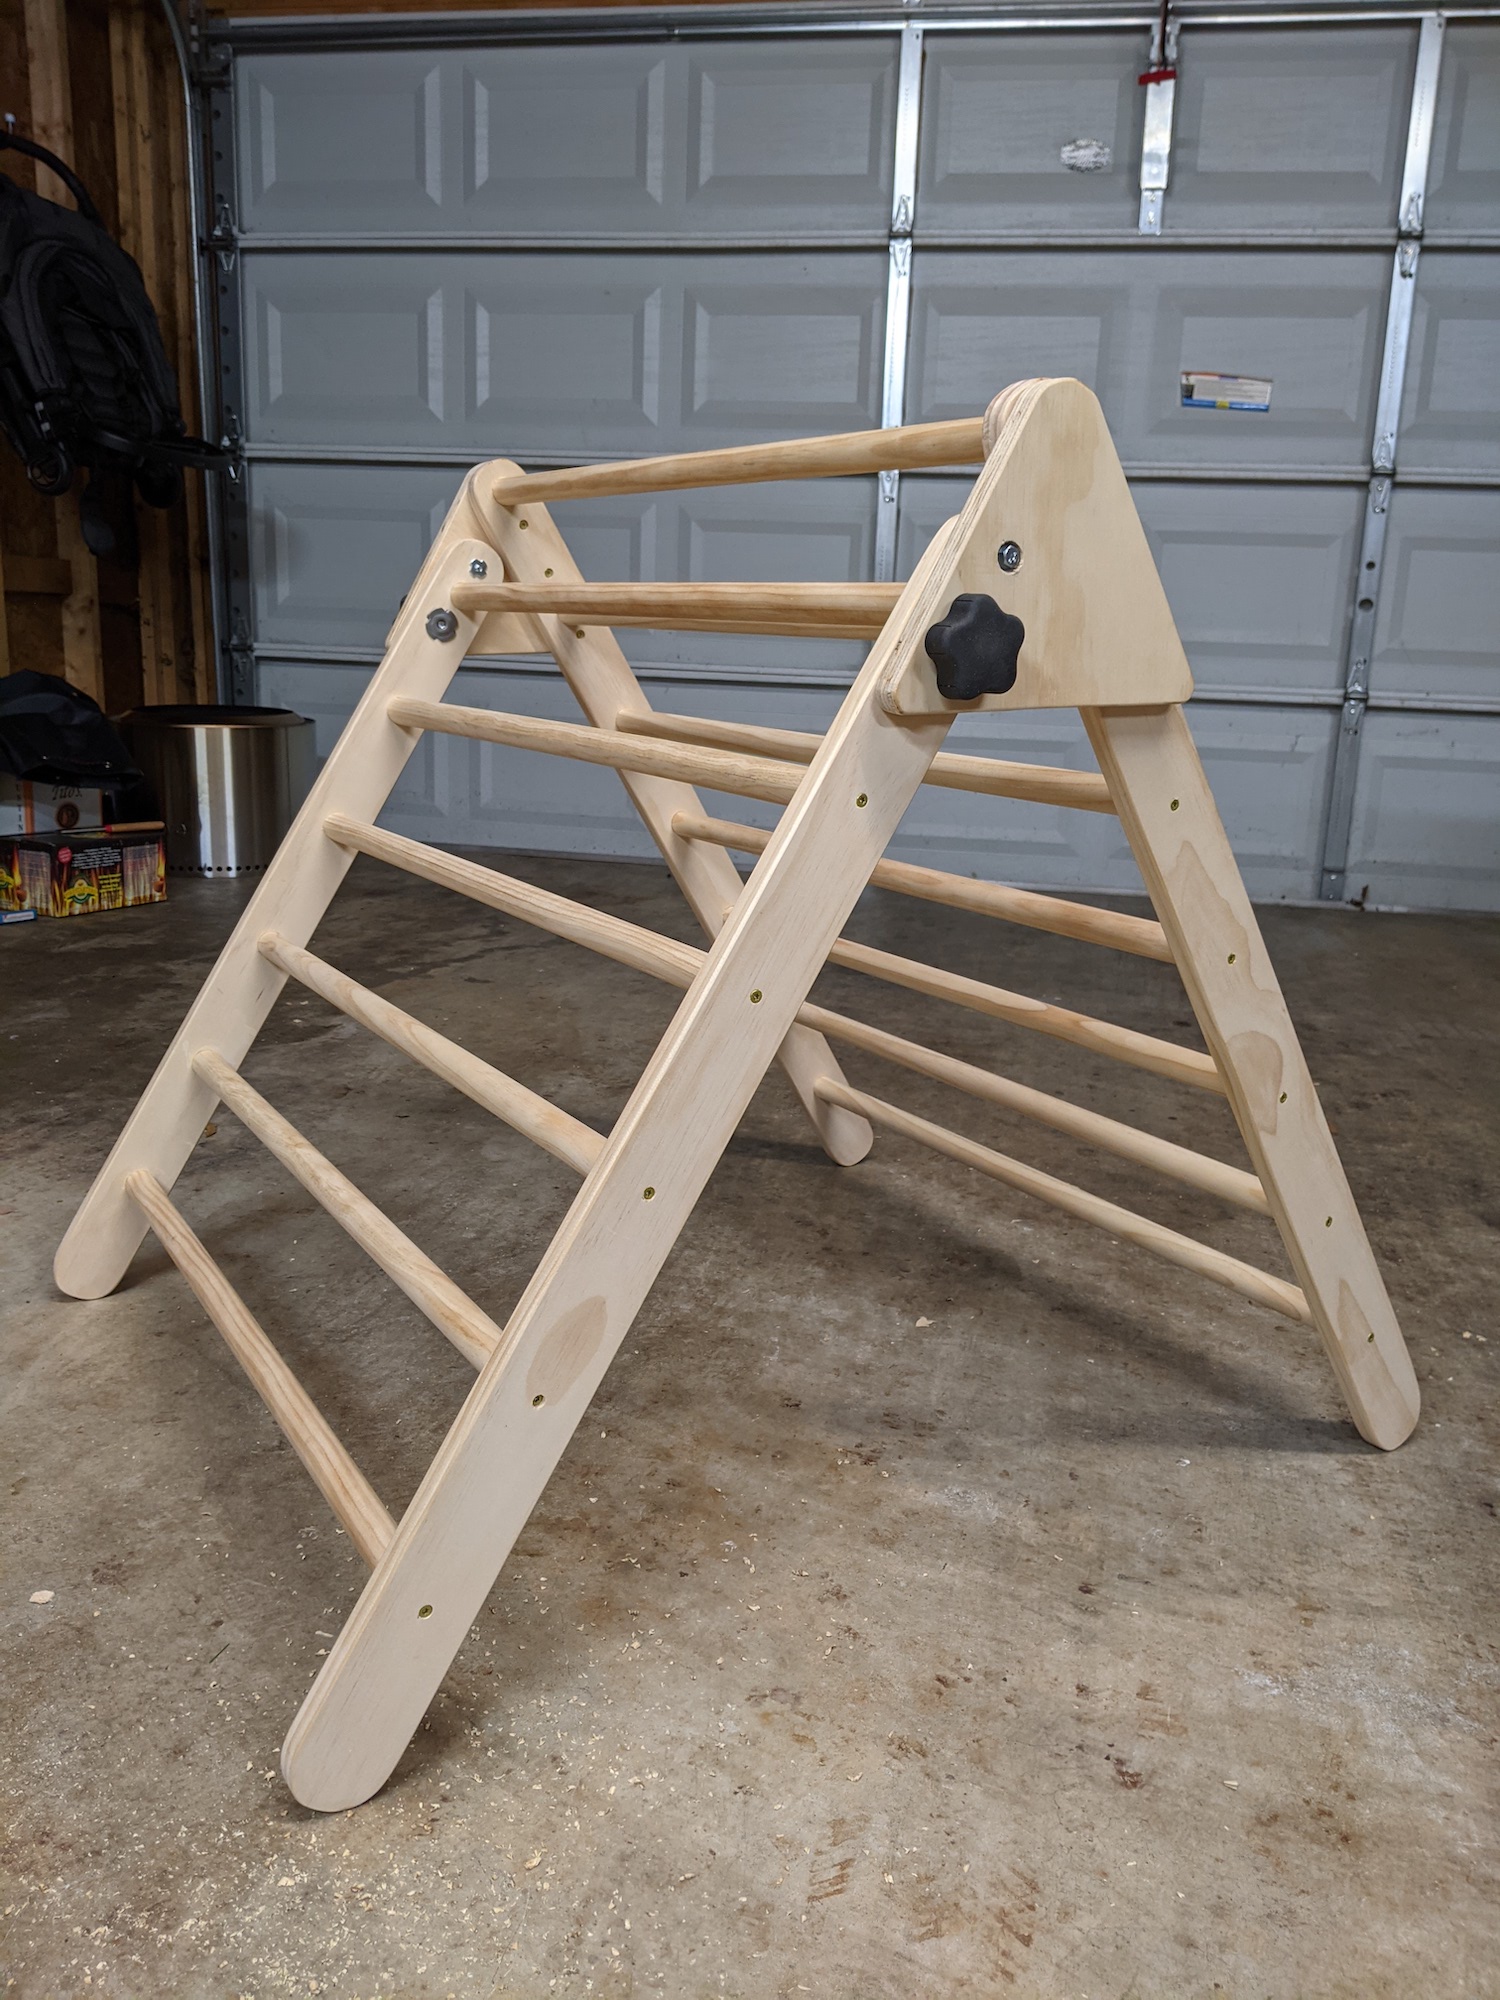
I built a Pikler Triangle and I was happy with it (see my previous article on how I built the Pikler Triangle). Deep down, what are we really trying to do here? We compare ourselves with others. We think if we can get even nicer stuff for our kids, they’ll be happier. They’ll be better. It’s not healthy and probably not accurate, but that’s what happened here.
We have friends that have a Pikler Triangle. That’s how I first heard about it in the first place. Our friend’s dad built theirs, so I had to make ours better. That was my challenge and I did it. The problem now is that our friends have a slide for their triangle. Our friend’s dad decided not to build the slide and instead, they purchased a $200 slide off of Amazon.
My advice: just buy that slide. If you want to see how I recreated it spending more time and more money, read on. There’s certainly a sense of accomplishment that I feel, but what is that worth? At least I have proven to myself that I can do it.
Building the Rails
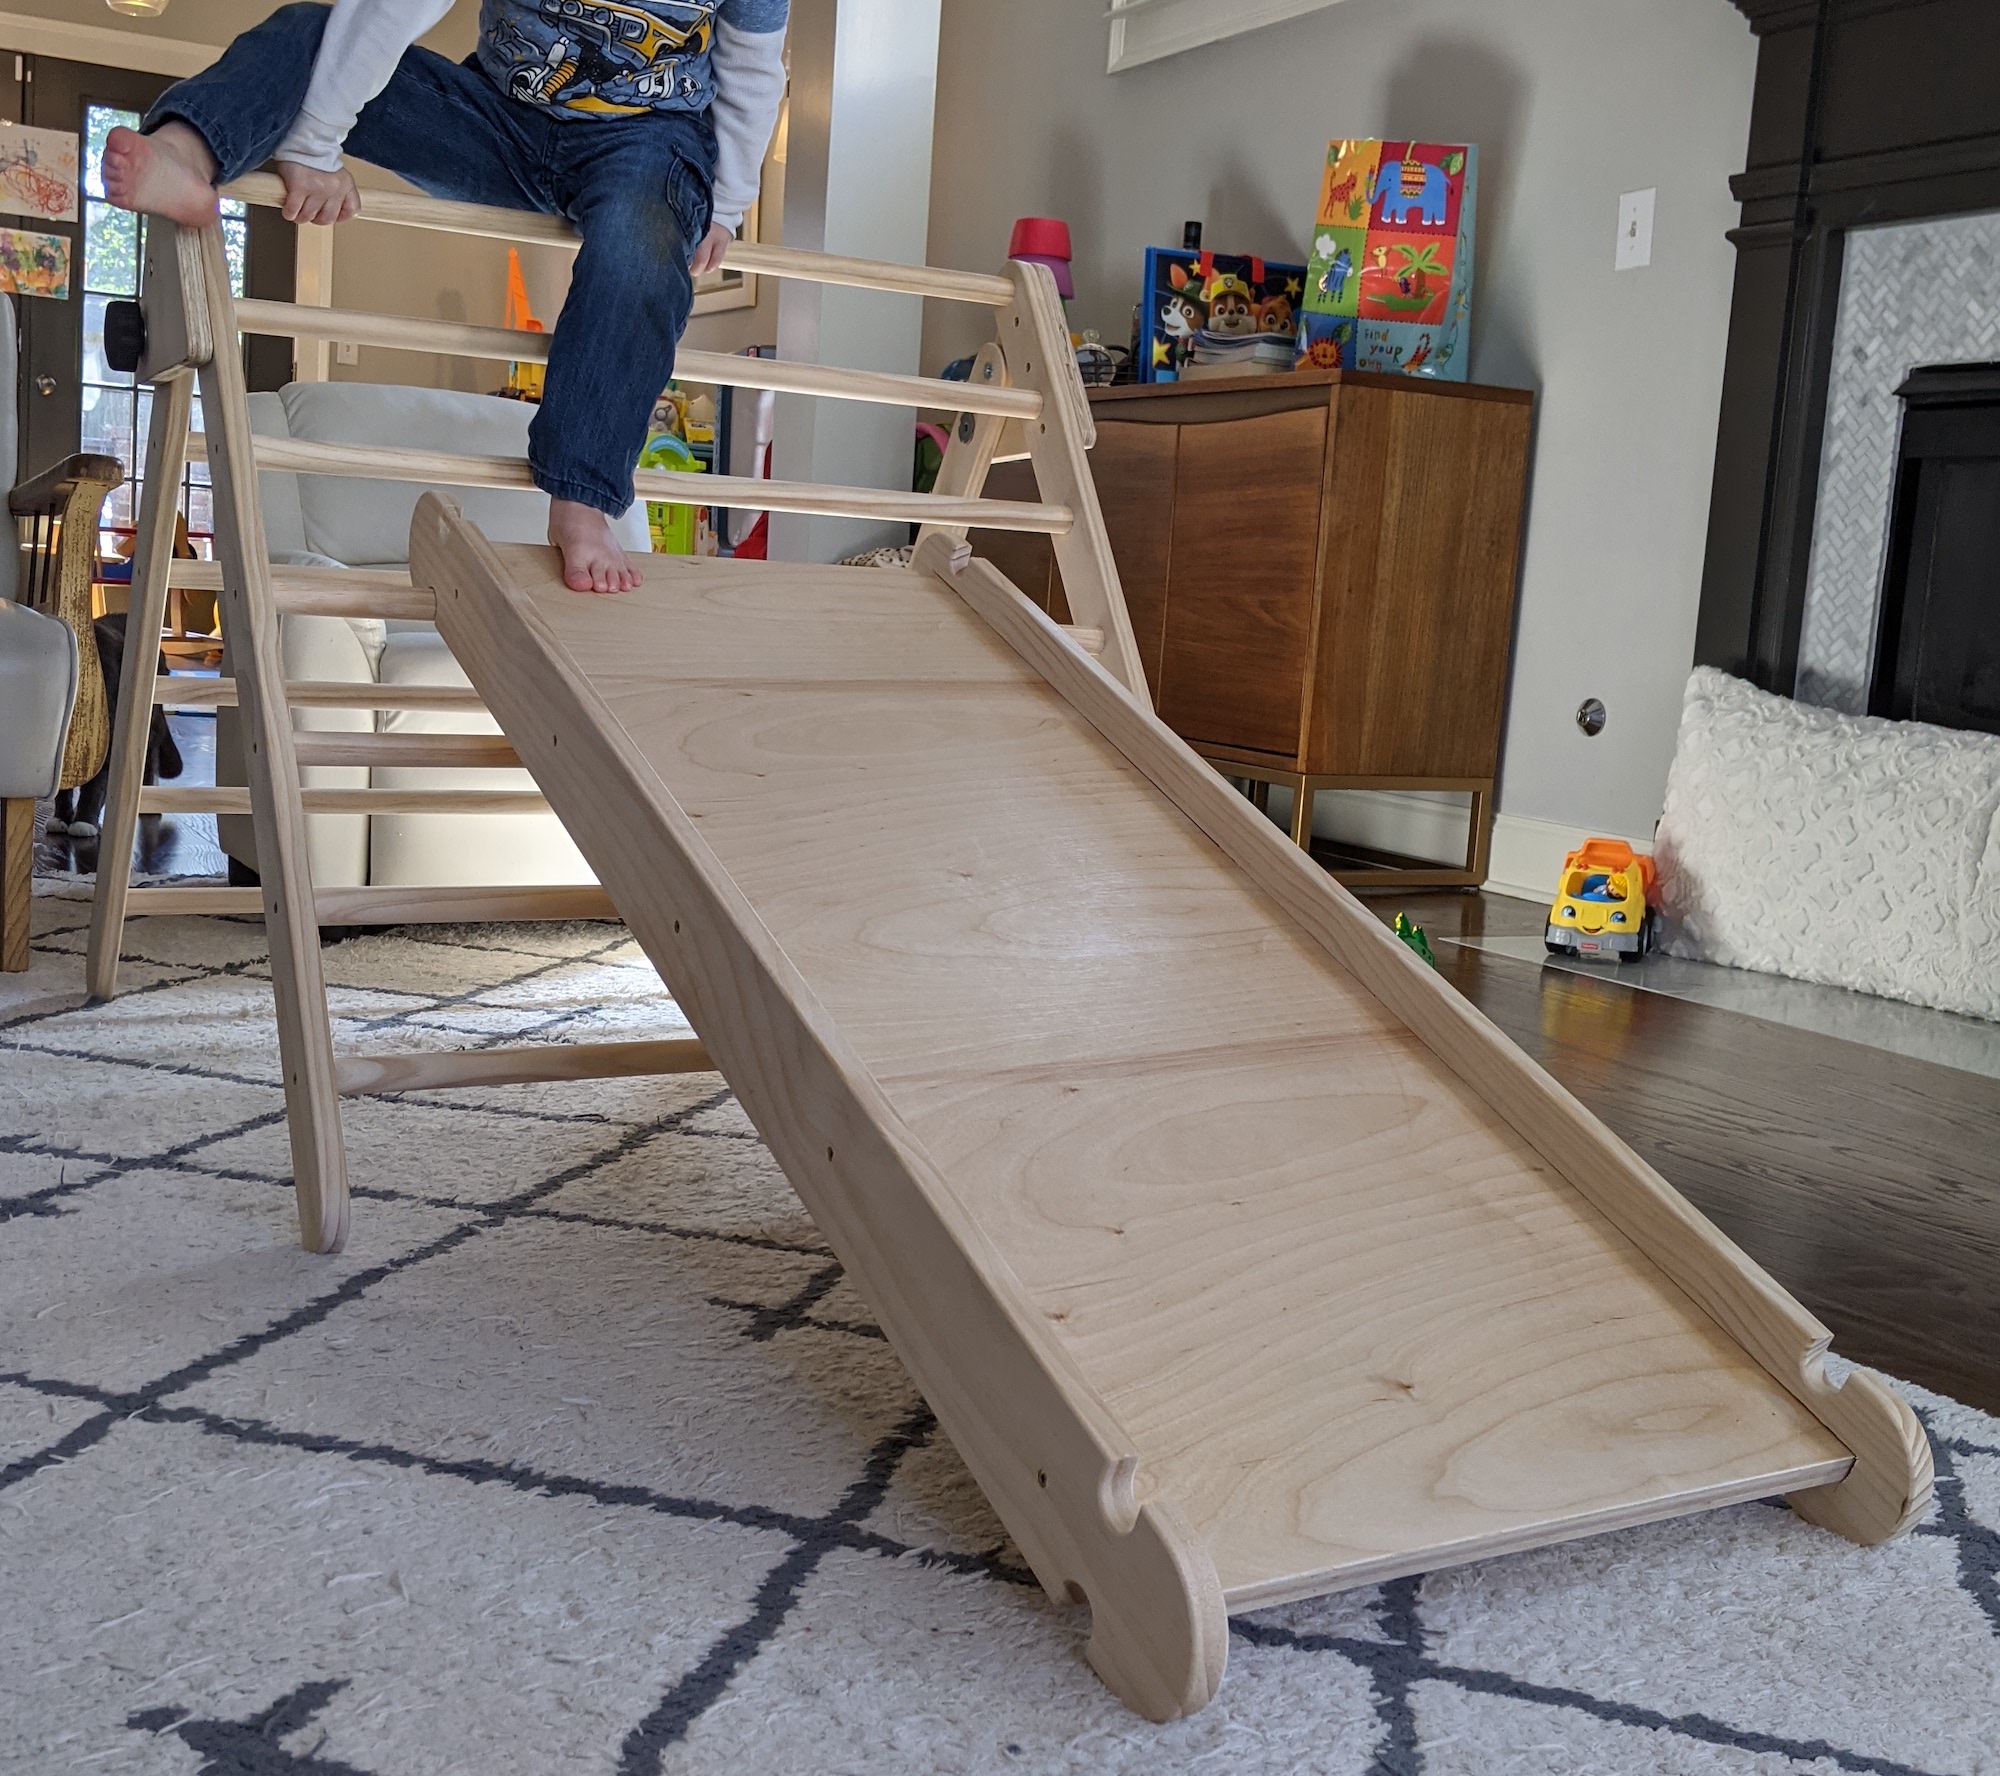
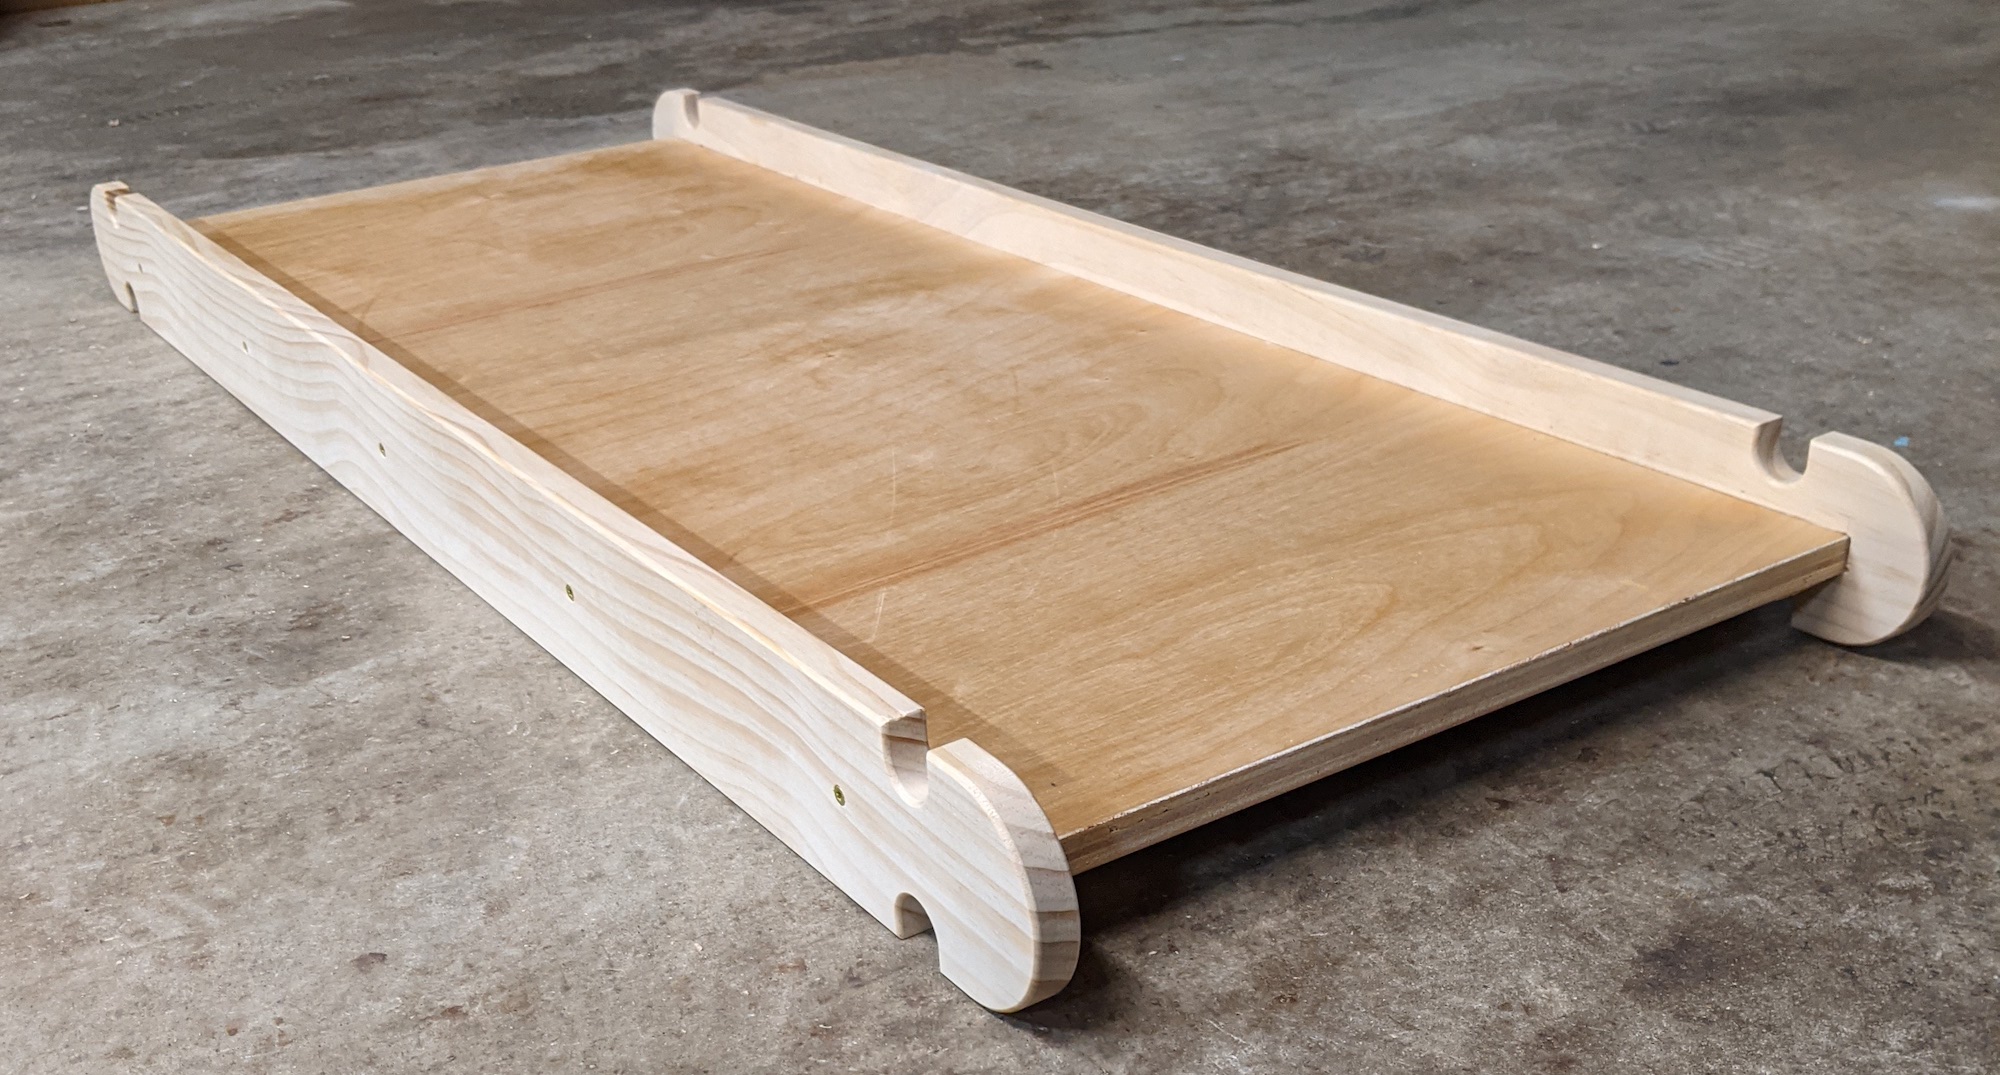
There are 3 pieces to the slide: 2 rails and 1 board in the middle. The board isn’t complicated. The rails are.
There are 3 complications to the rails:
- The rounded edge at each end.
- The 2 circles at each end to accept the rails of the Pikler Triangle so that the slide is firmly attached.
- A dado down the middle of the rails to join with the center board.
The rails are the hard part to this slide. I made close to 10 attempts before being successful with these rails. I hope to help you learn from my mistakes.
To build the rails, I made (a few) templates to use with the router. The idea being to get the template right and then I can create as many identical rails as I want. I made that template out of 1/2 inch MDF. Later on, I’ll use a flush trim router bit to follow the template and make my actual rails.
Building the Rails - the rounded edge
My first attempt at a rounded edge was to use a protractor and draw a nice circle at the end of the piece of MDF.
I do not recommend doing this. I tried it many times but could never actually cut out that rounded edge in a way that looked perfect. Even after sanding, the rounded edge was always somewhat wonky. It would have worked, but I wanted it to be perfect.
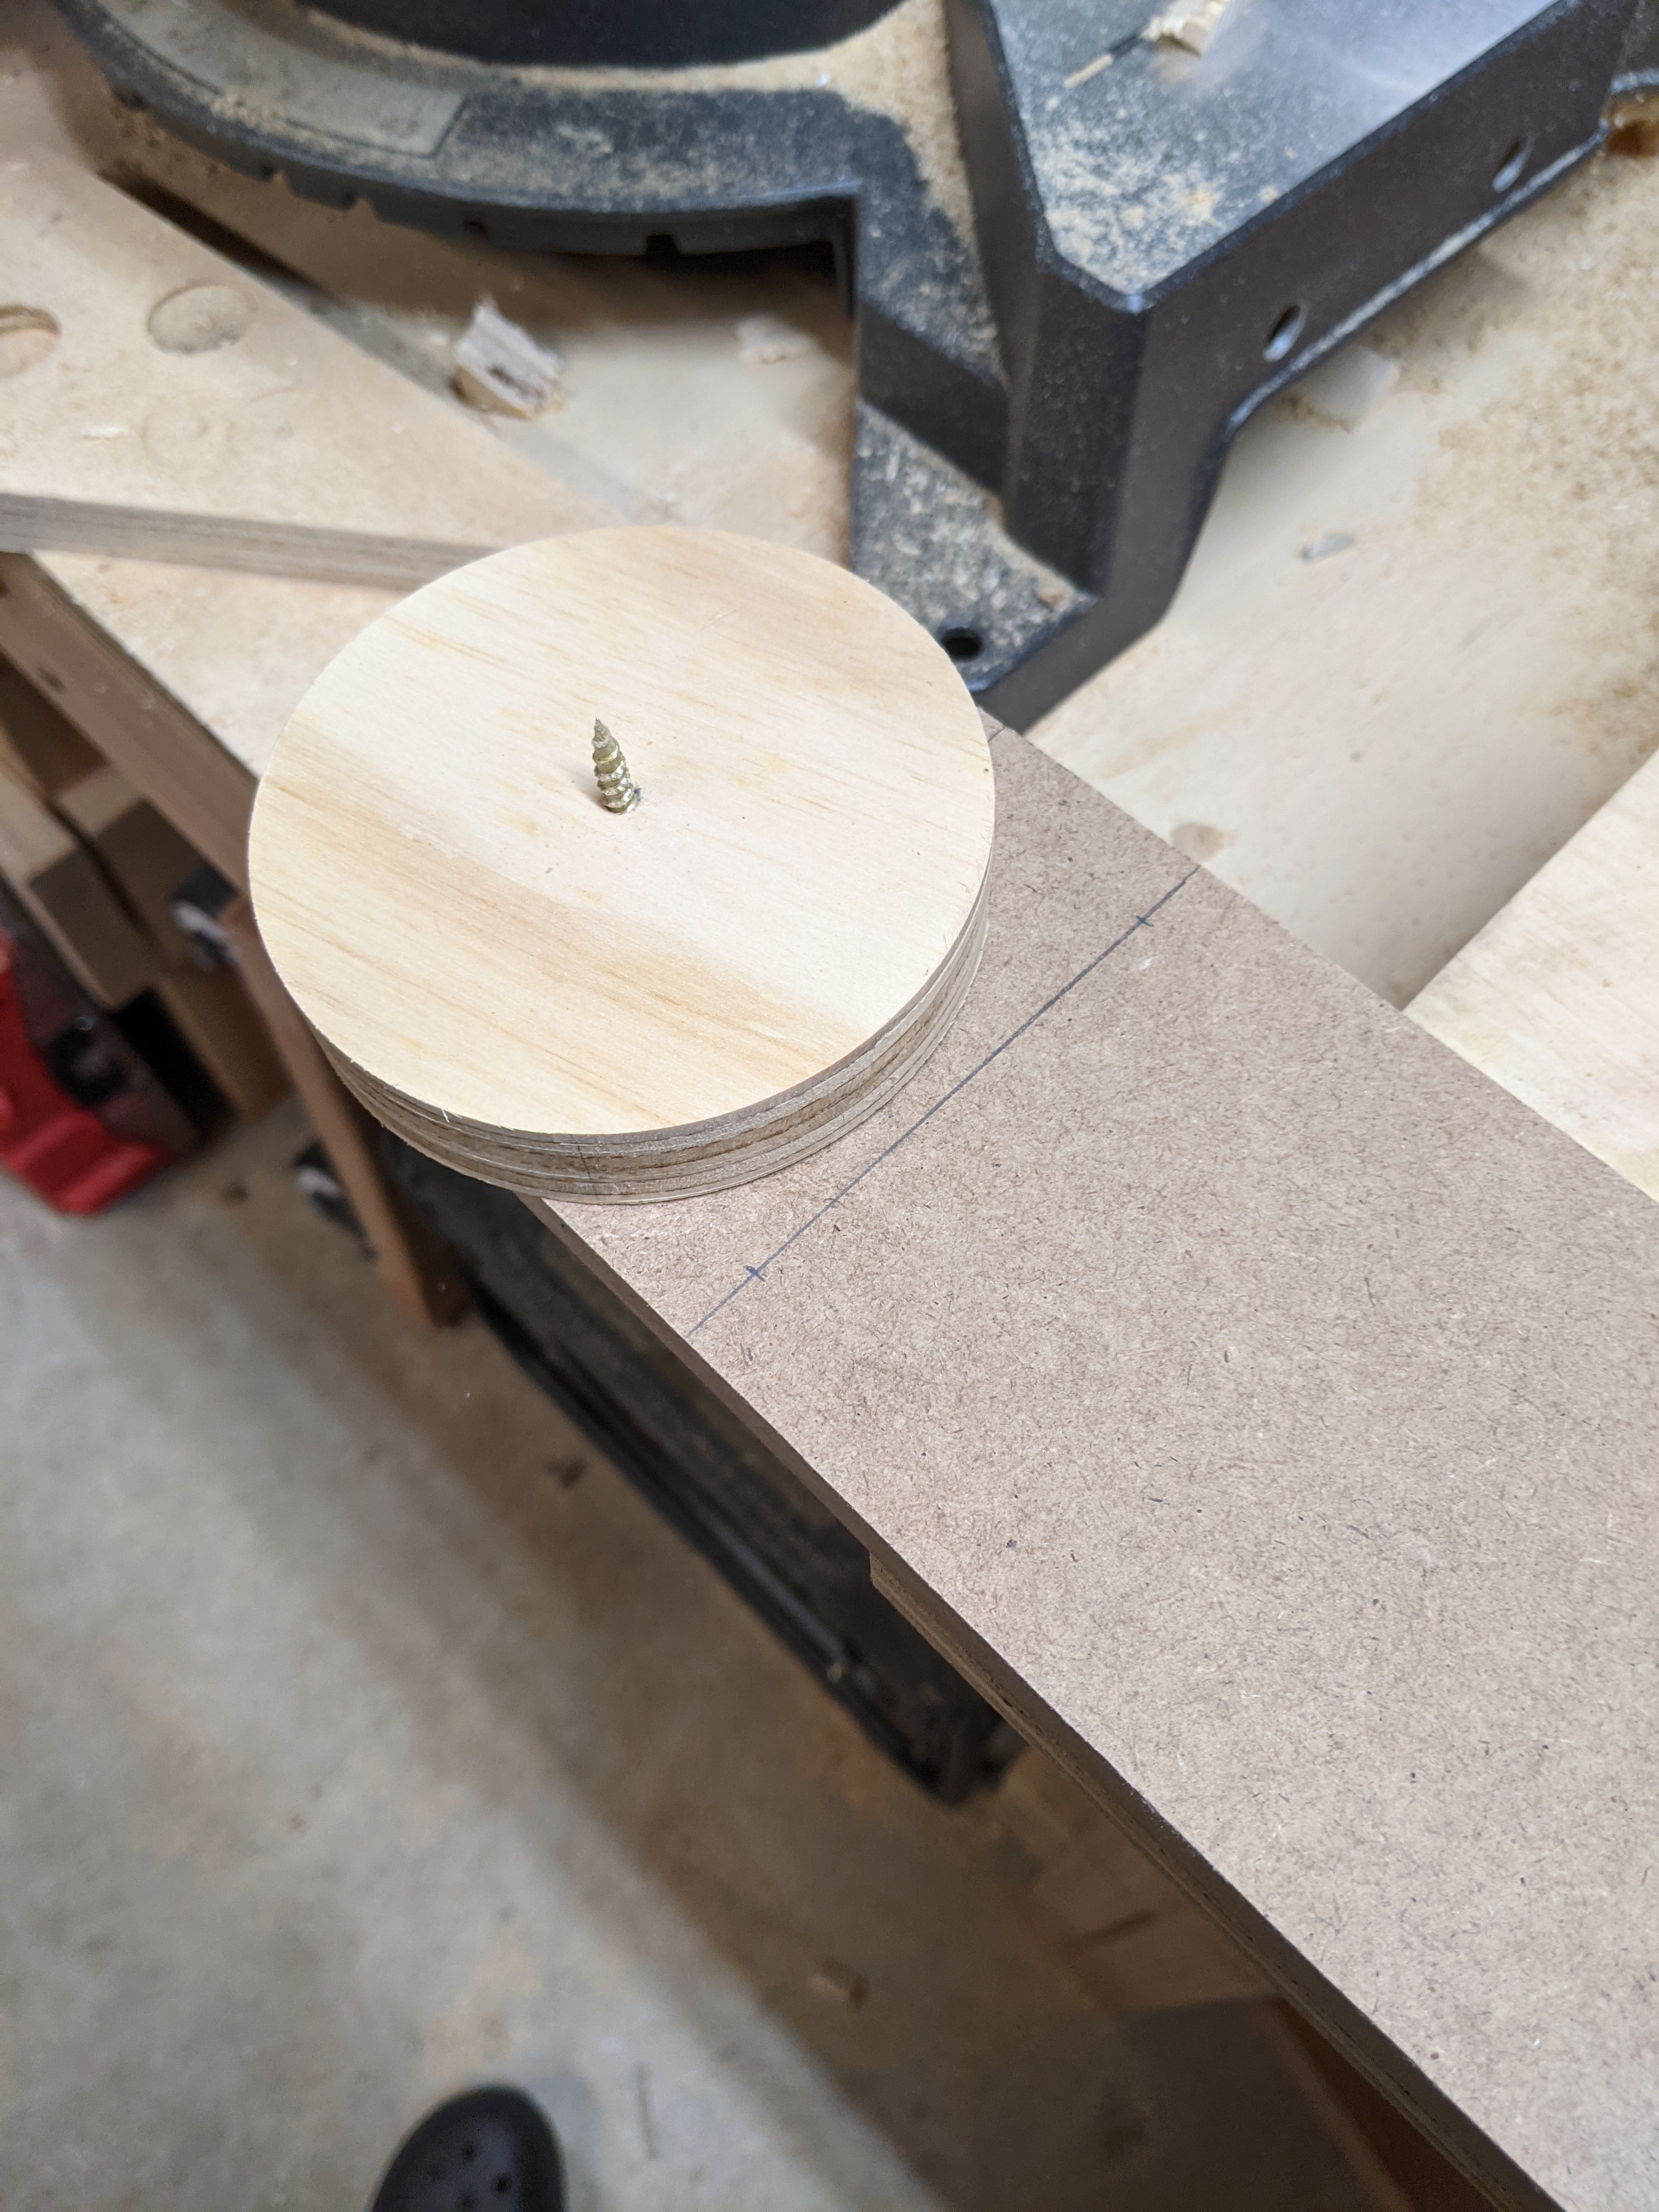
The way that I made it perfect was to use a router jig to cut out a perfect circle. I purchased the Jasper Circle Jig Model 240. I used 3.5 inch wide select pine wood for my rails. Using this jig, I cut a perfect 3.5 inch circle out of some scrap wood with my router.
I took that 3.5 inch circle and screwed it into the end of my MDF rail template. Then, using a flush trim router bit, I followed the circle to transfer that perfect circle onto my MDF template. It worked great and I had a perfect circle on the end of the template. I sanded it a little as well, but it wasn’t necessary.
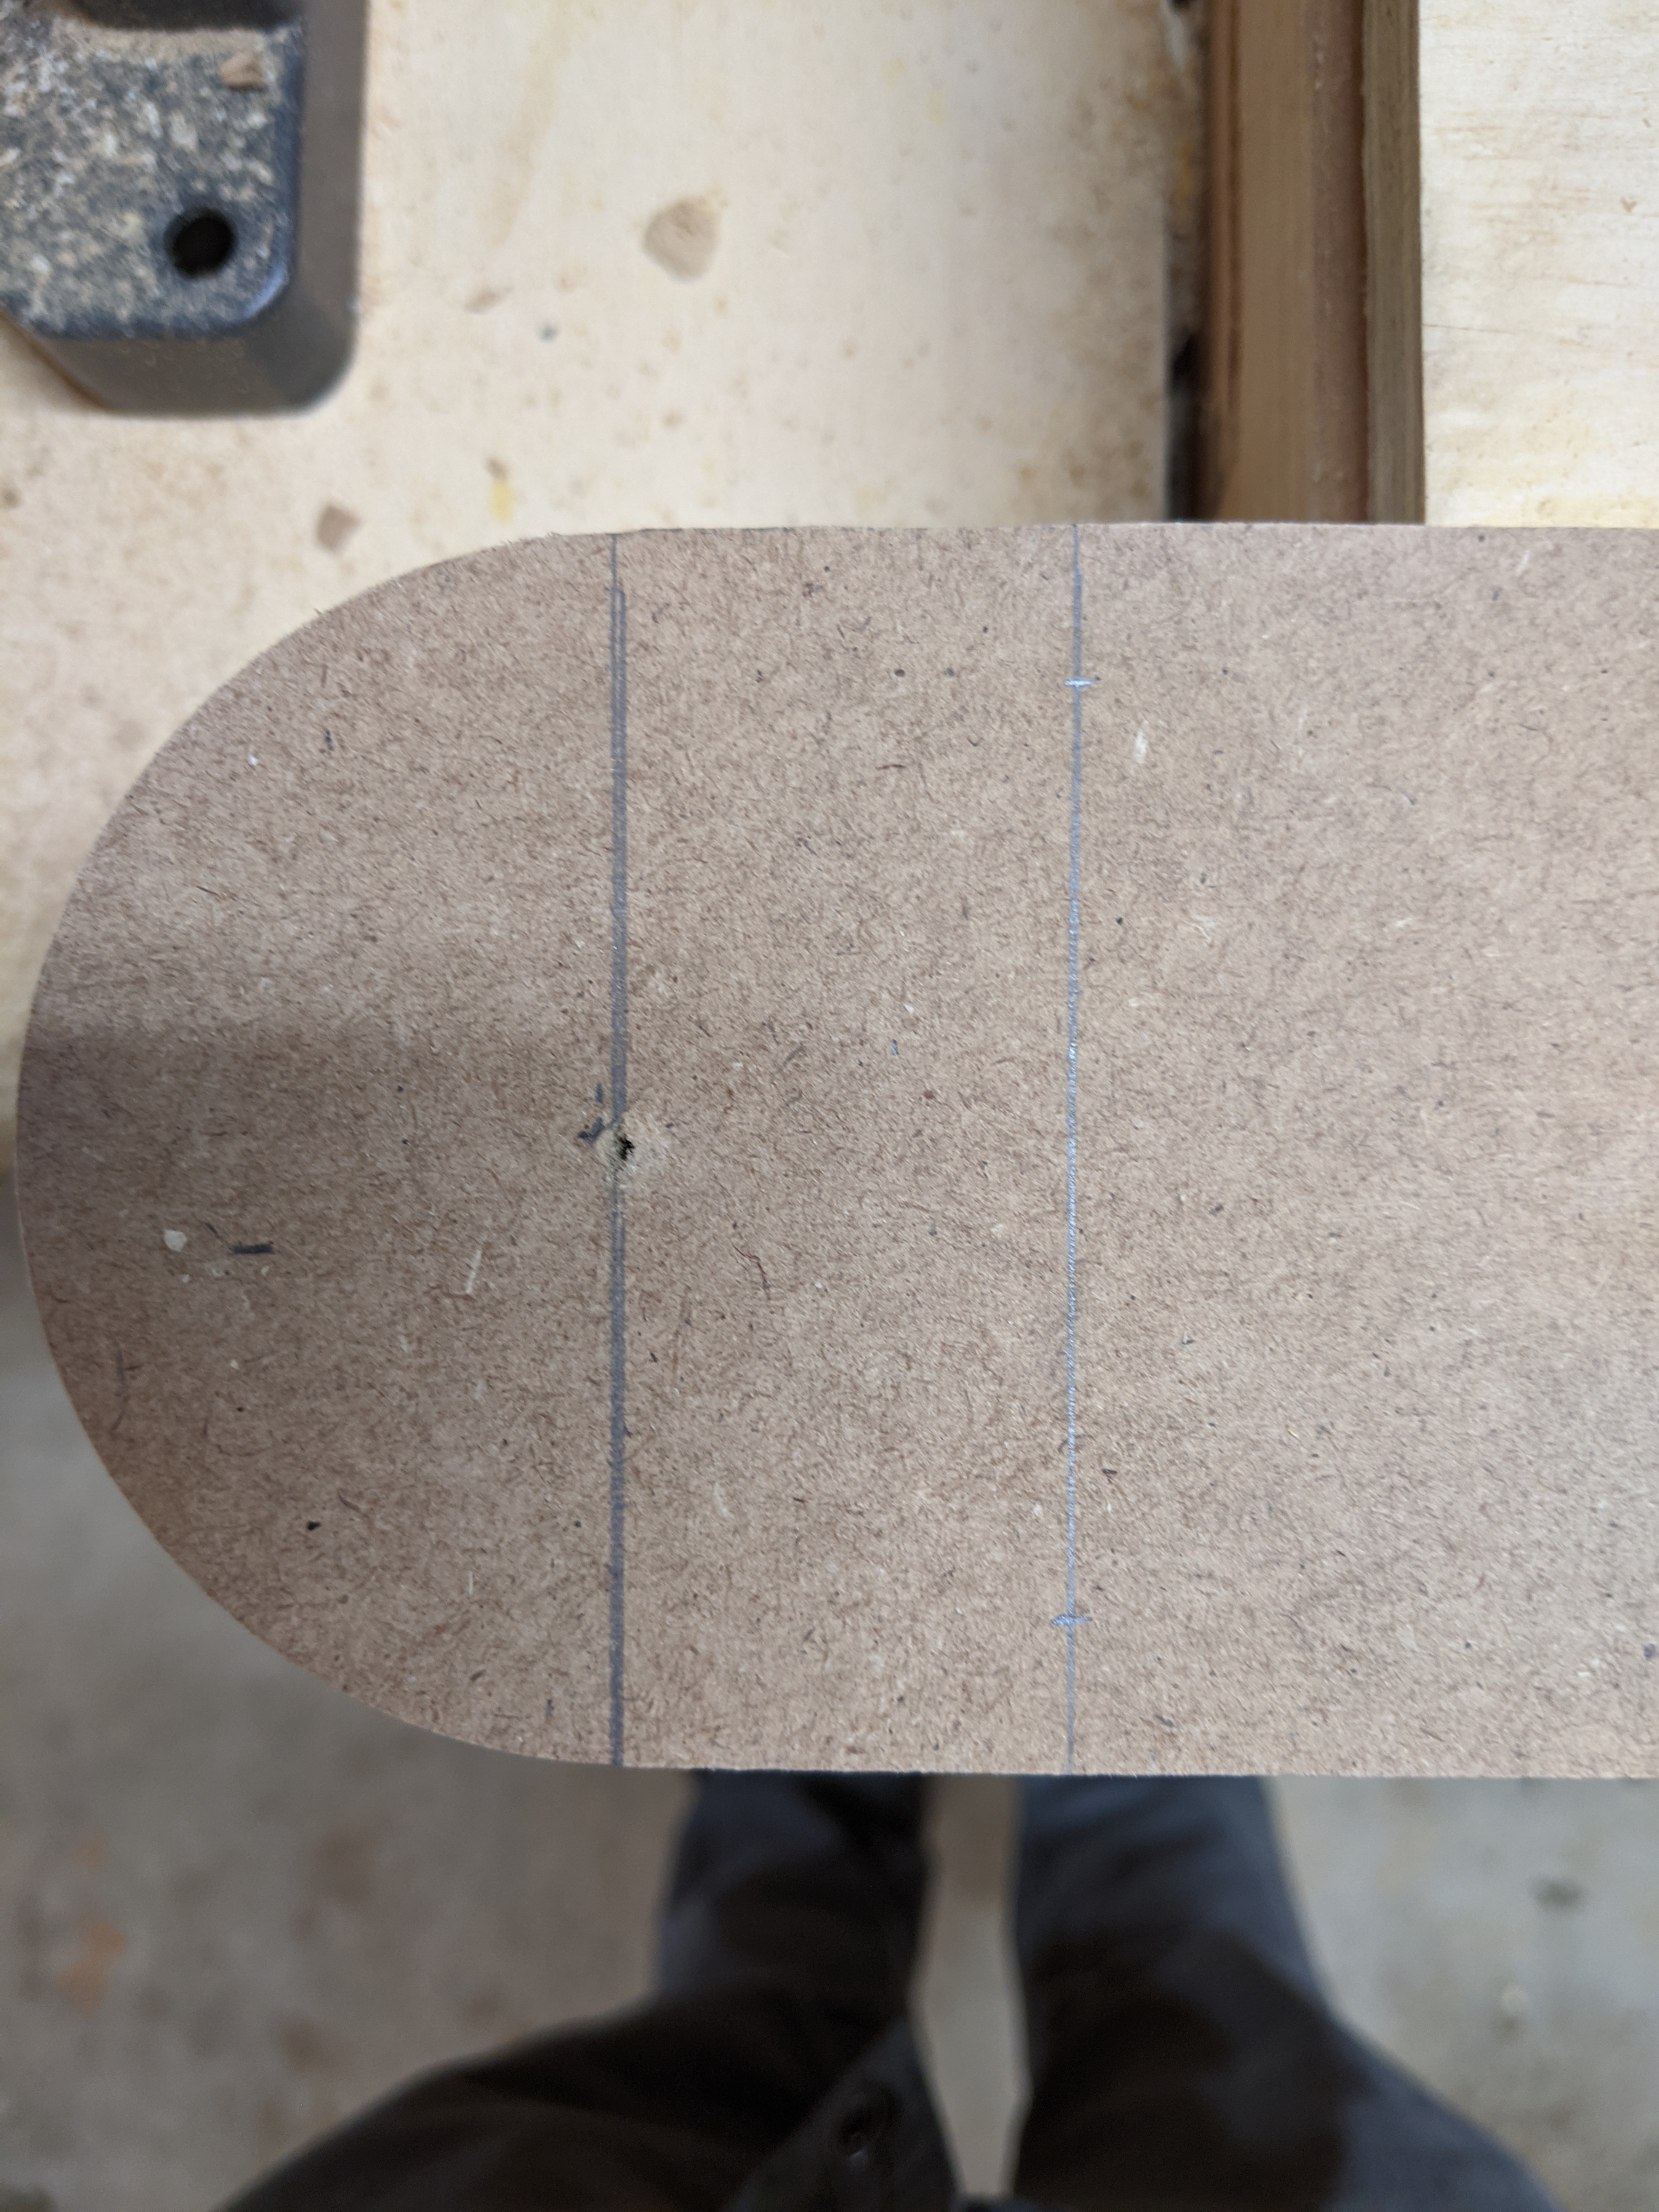
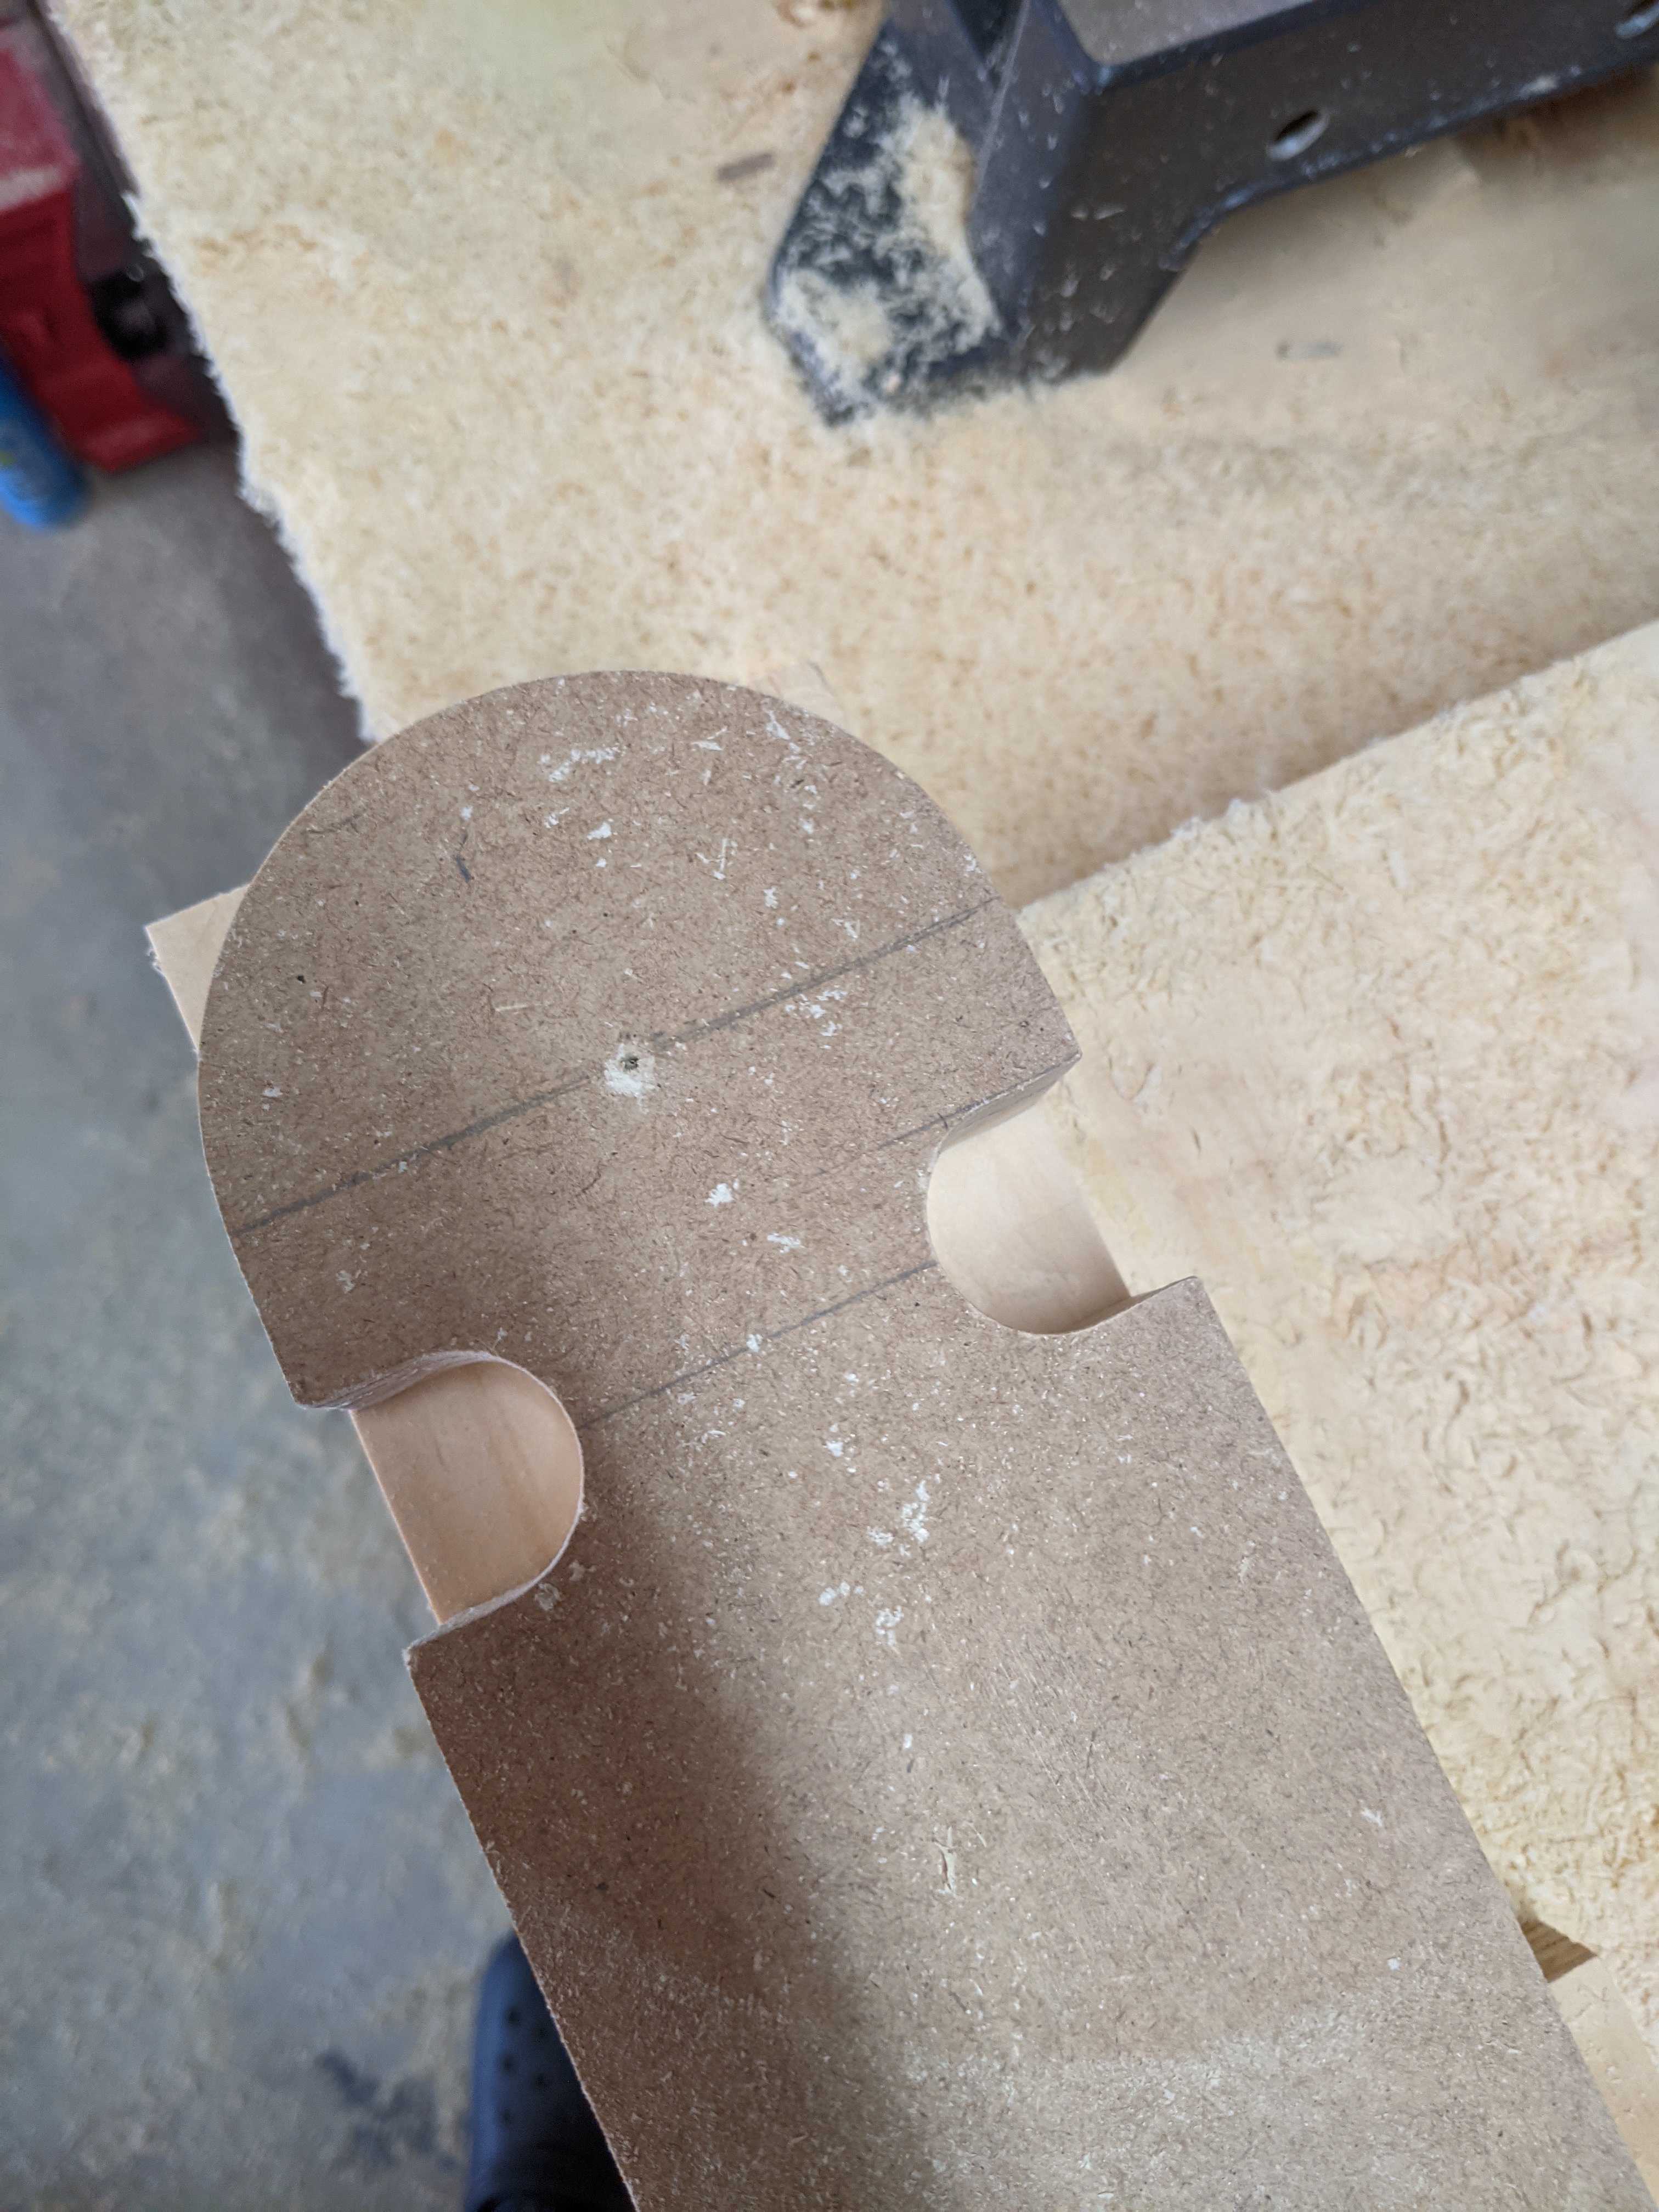
Building the Rails - the 2 small hooks
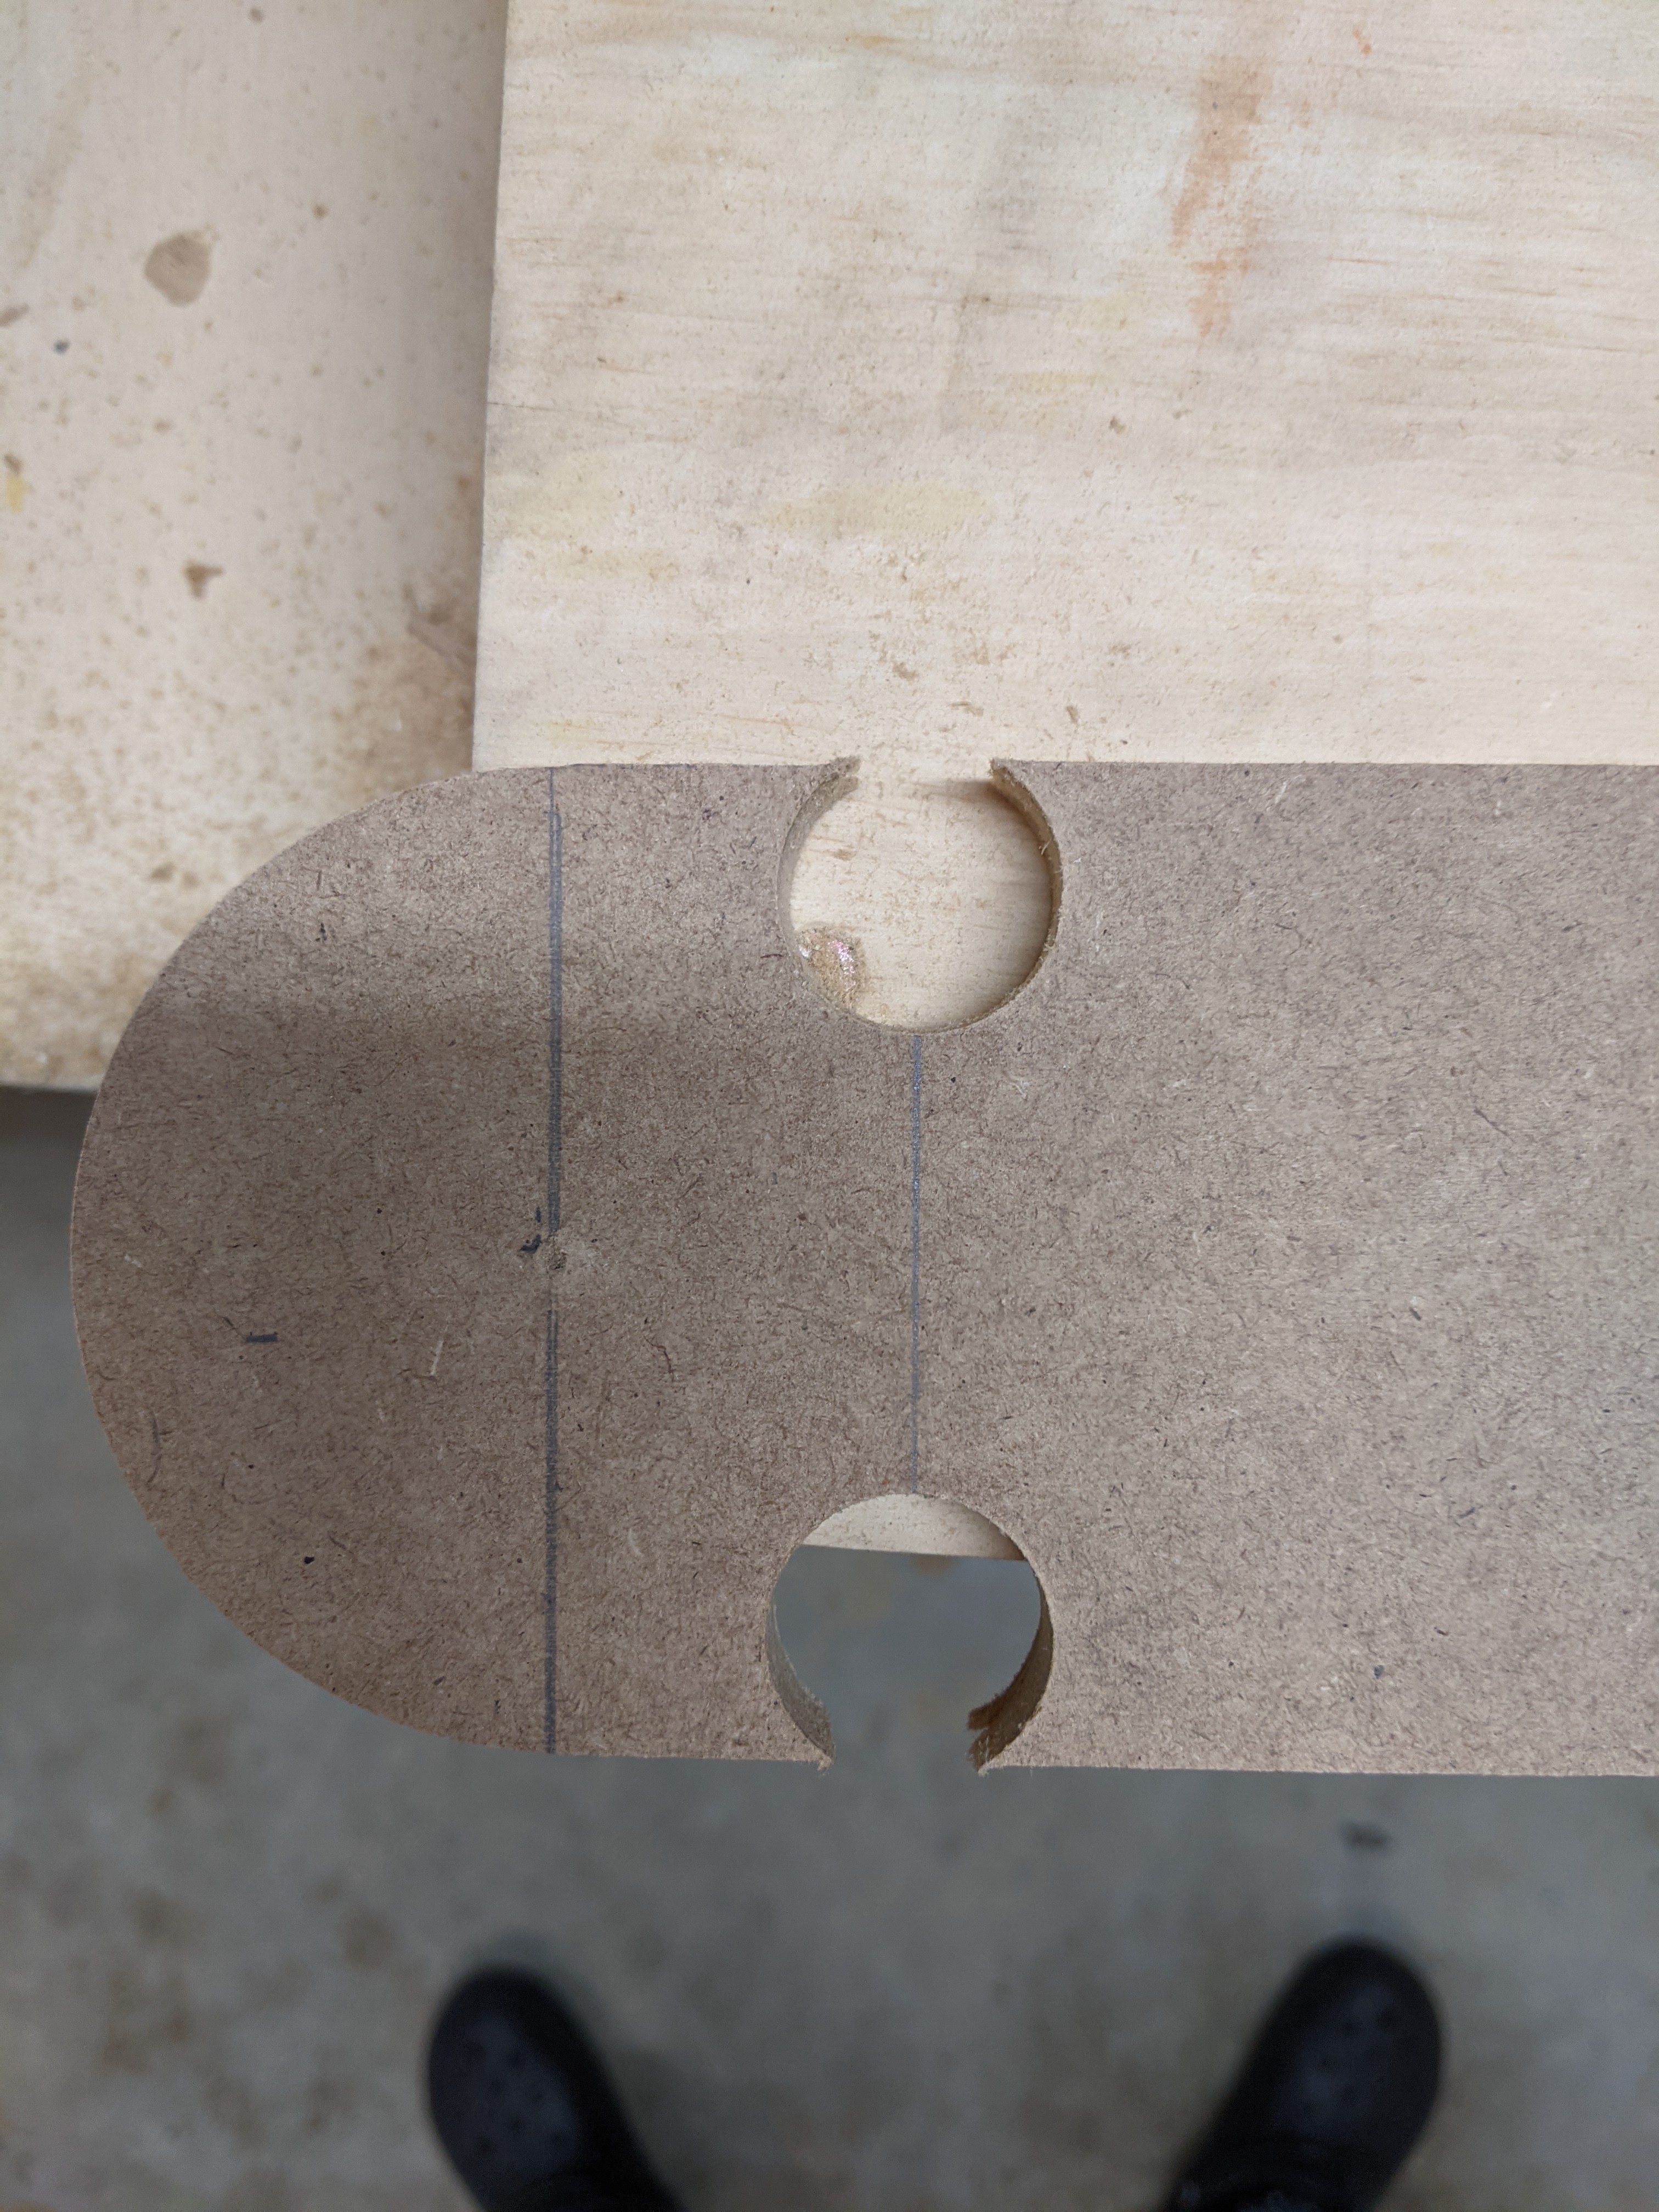
Next, I added the 2 hooks. These are the 2 small circles that can sit on the Pikler Triangle rails securely.
My Pikler Triangle dowel rods are a 1 inch diameter. I used a 1 inch Forstner bit in my drill to create these holes. After sanding these a little, they slip onto the triangle dowels easily but are also secure.
Then, I just needed to saw off the leftover edges and sand to make it smooth. This made my edge pieces look great and professional.
Building the Rails - using the template
After completing the above steps, I had an MDF template that I could use to make the end cap of each rail.
I cut my 3.5 inch select pine to length (47 inches). On each end of each piece of pine, I clamped my MDF template on and used a flush trim router bit to transfer the template onto the actual rail piece.
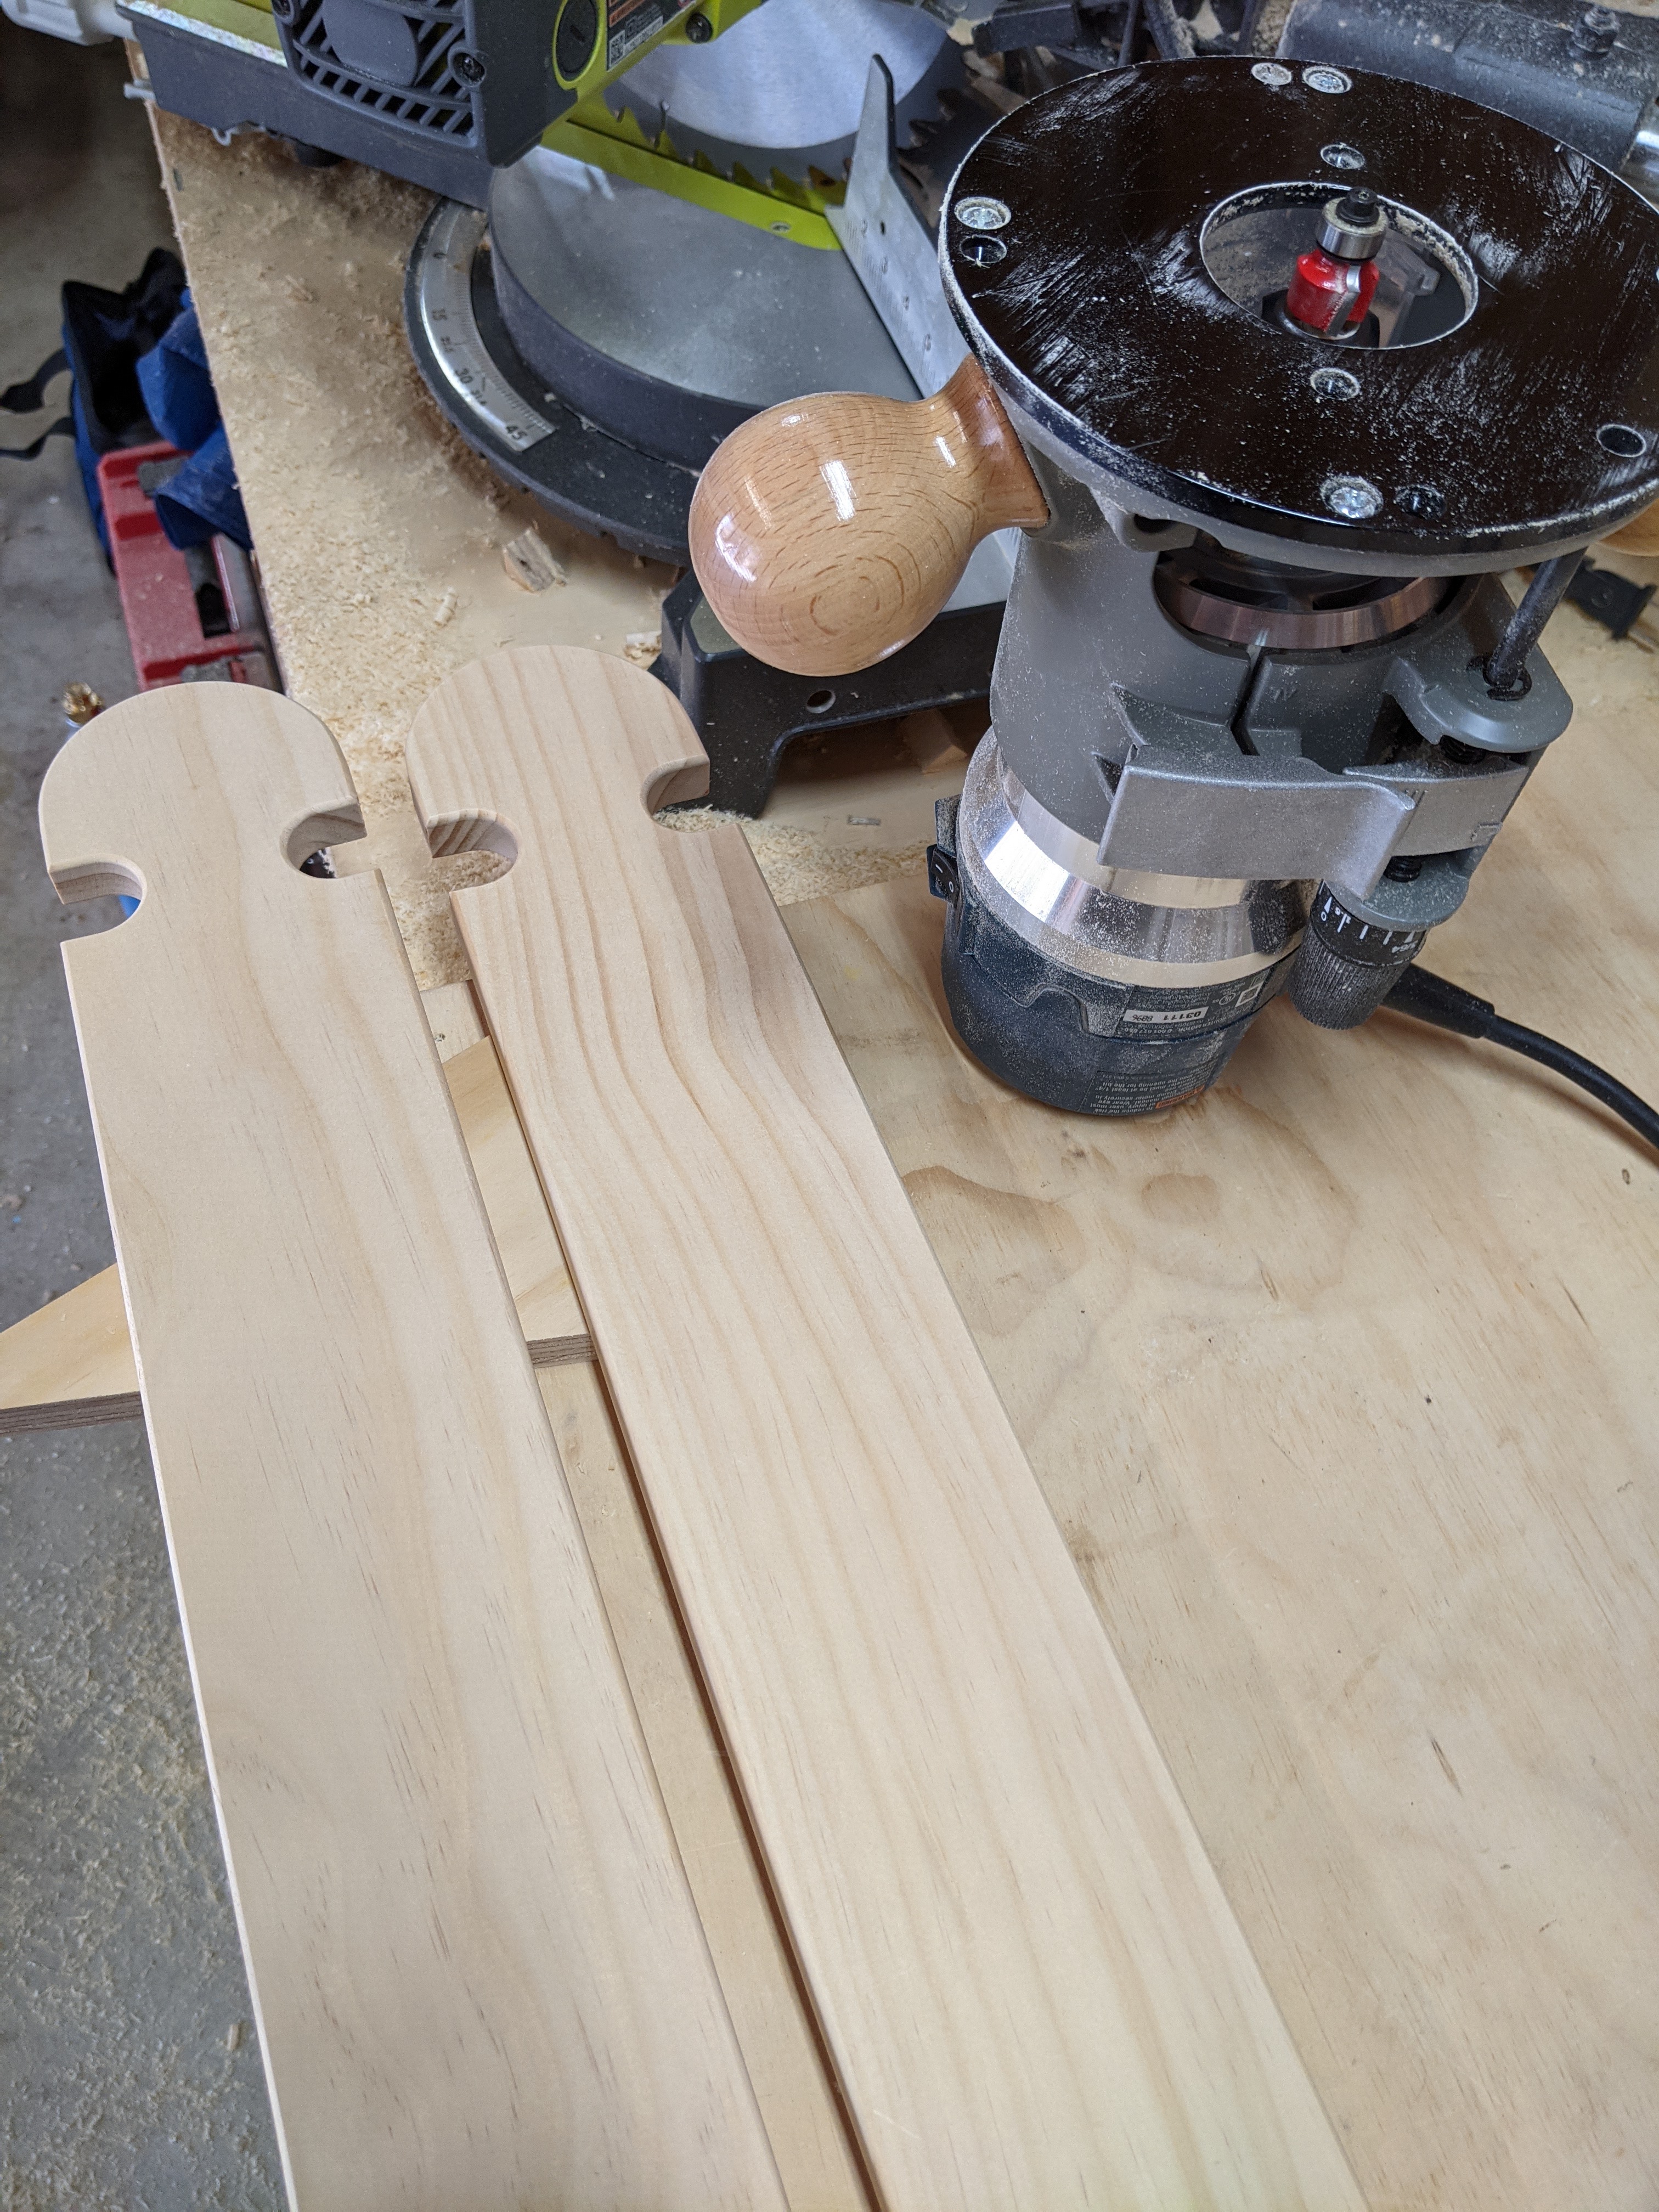
I had some challenge here with chip out. There are curves and small, delicate areas in this design. It worked best when I routed out the material in a few passes. With the size of my router bit, I was able to do this in two passes. The first pass took off 80% of the material and then I lowered the bit and took off the remaining material. That helped with Chip out. Also be sure to follow the grain as much as you can. If you are routing in the wrong direction, you’ll feel the router kicking back a bit and you’ll be much more likely to get chip out.
After the edges were complete, I used a 1/8 inch roundover bit on my router on all edges to make a nice professional look and to have no sharp edges.
I also sanded each rail.
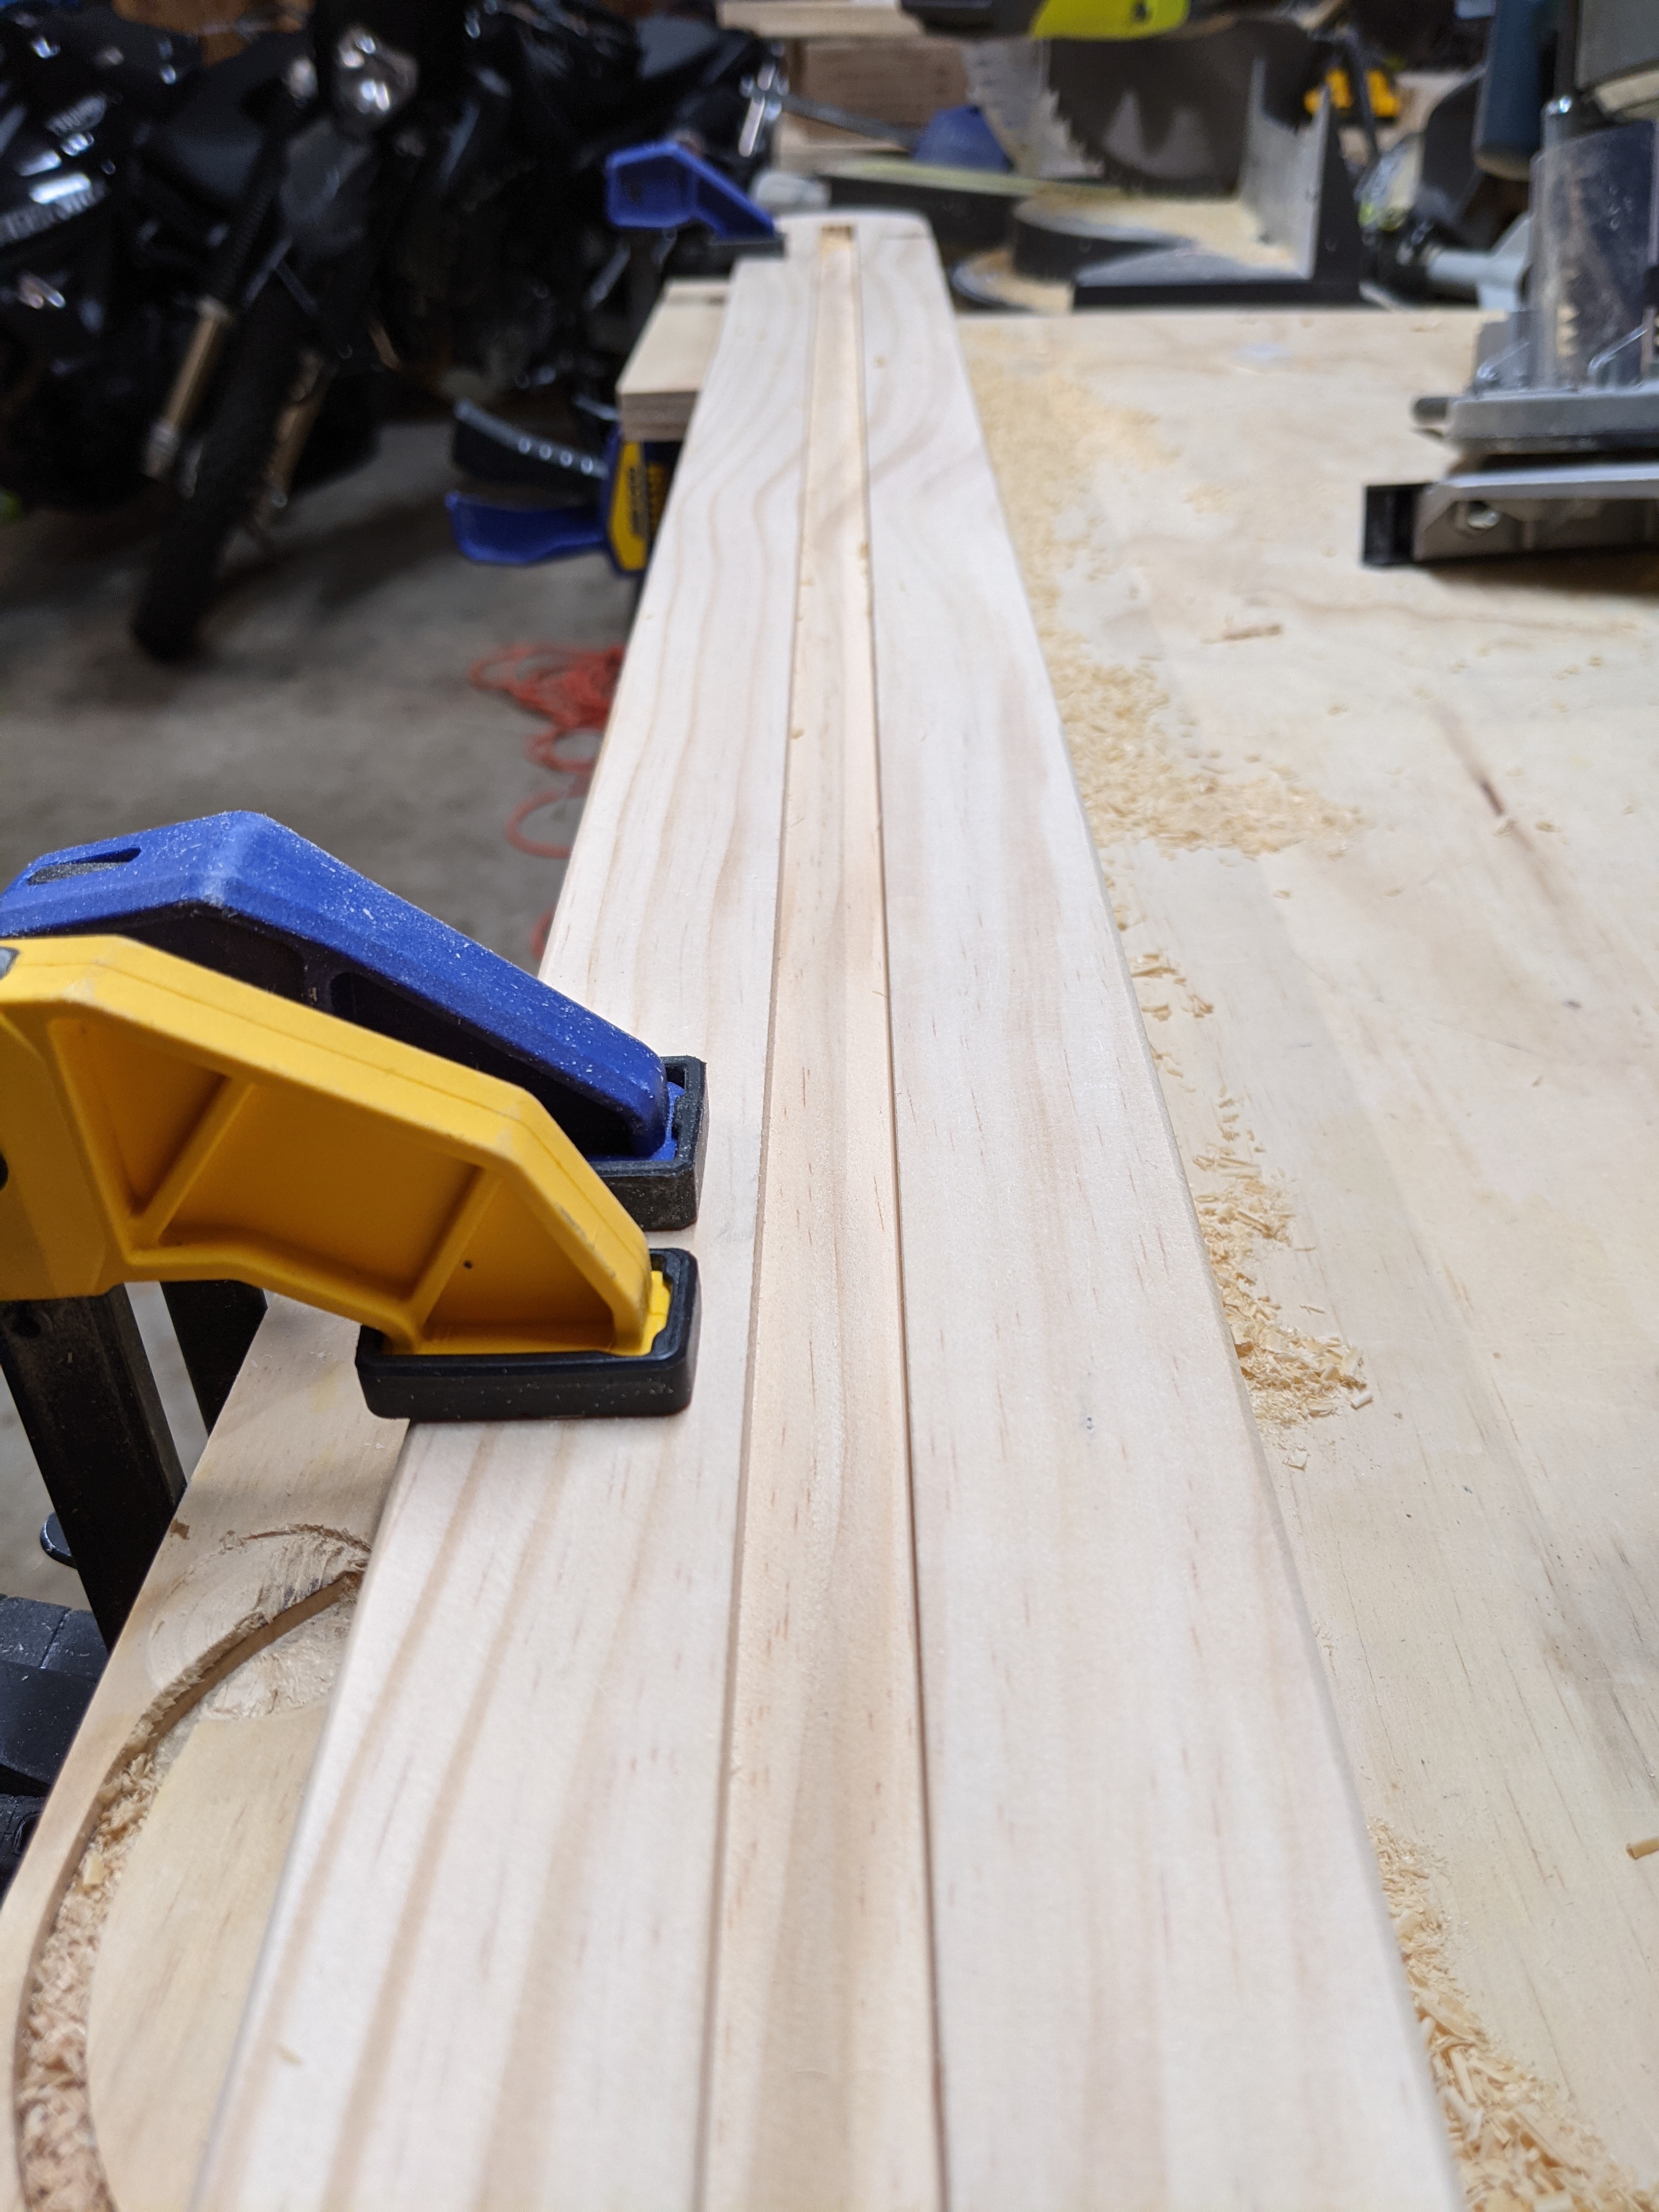
Building the Rails - the dado
The dado runs down the middle of both rails and allows for the middle piece of plywood to join with the rails.
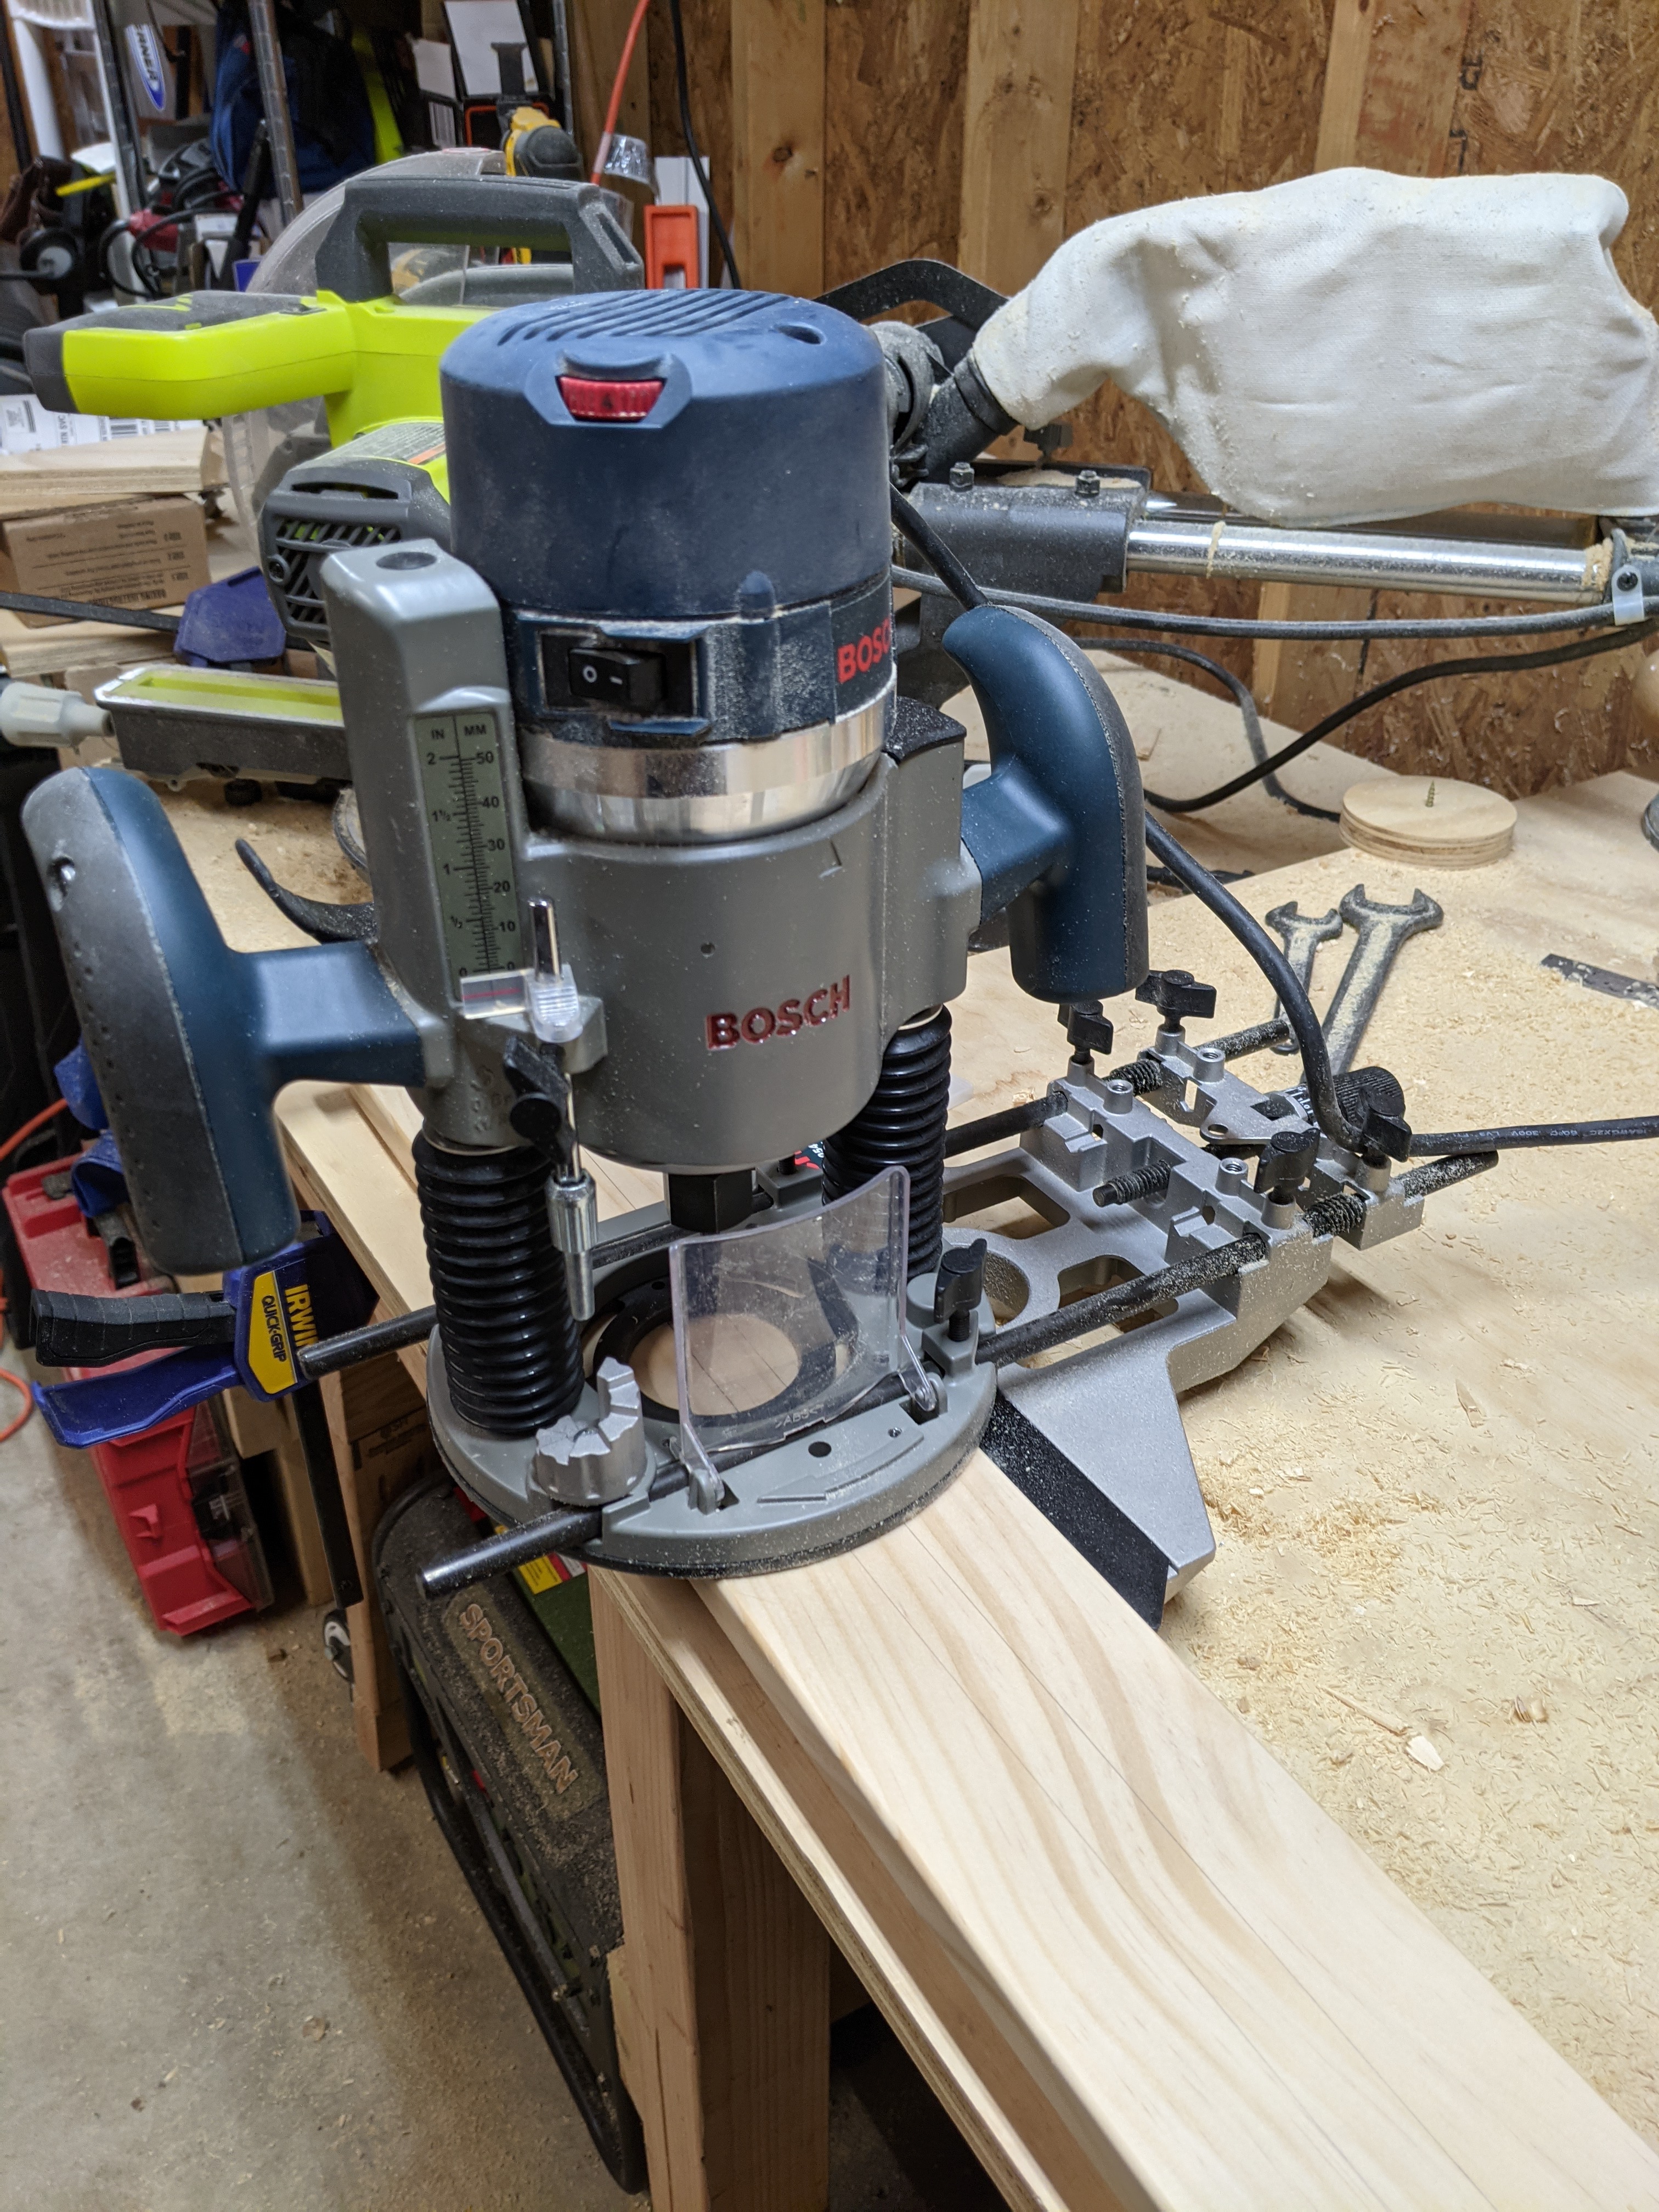
I measured out the center and drew exactly where I wanted the plywood to go. Then, I used this edge guide with my router to make straight cuts down the middle of the rails.
I tried to sneak up on the size of these dados so that the plywood was snug. I’d cut just slightly under and then do a test fit. Then come back and carve off just a little more of the dado until the plywood slipped in securely. This was a little challenging because the top layer of veneer on the plywood started to peel off with how tight of a fit it was. In the end, the veneer was fine, but be cautious. If I did it again, I might try to make the middle section out of solid wood.
Another challenge I had was the end of these dados. I used a 1/4 inch router bit to carve out the dados. The terminating end of these cuts are small 1/4 inch circles. I used a chisel and tried to make these edges as square as possible. In the end, it’s not perfect, but it works well enough and is one of those details that others don’t notice.
Building the Rails - joining
The rails were done. The only thing left to do was to join the plywood to the rails.
I used screws to make that connection strong. I used 5 screws on each side spaced out evenly. For each of them, I drilled a pilot hole, then drilled a counter sink hole with a Forstner bit. Then drove in my screws. I used 1 1/4 inch screws.
Completion
After all of this, the slide looks great. I have not yet done the rock wall side. I’ll likely buy some climbing holds and screw them on. My kids don’t really care about the rock wall side anyway.
The kids love it. They slide down it all the time and that completes my Pikler Triangle journey. When my 3.5 year old saw the slide, he said completely unprompted that it, “looks like our friends”. Mission accomplished.
Detailed steps
Materials used:
- Rails - 2 3.5 inch wide rails cut to 47 inches long - 1 in. x 4 in. x 6 ft. Select Pine Board
- Plywood - Cut to about 43 3/4 inch long and 17 1/2 inch wide Birch Plywood (Common: 3/4 in. x 2 ft. x 4 ft.; Actual: 0.728 in. x 23.75 in. x 47.75 in.)
- MDF template - Rip to 3.5 inch wide to match pine rail width - Medium Density Fiberboard (Common: 1/2 in. x 2 ft. x 4 ft.; Actual: 0.483 in. x 23.75 in. x 47.75 in.)
- Screws - 1 1/4 inch screws
- Cut above material to size.
- Cut a 3.5 inch circle out of some scrap plywood using the Jasper Circle Jig Model 240.
- Screw the 3.5 inch circle into the top of the MDF template.
- Use a router and flush trim bit to trace the top half of the circle onto the MDF template. I use the Bosch 1617EVSPK Wood Router and the ZokMok 1/4 Shank Pattern Flush Trim Router Bits Set.
- Drill two 1 inch circles behind the end circle. These are the holds/hooks that go onto the Pikler Triangle dowel rods. I used a 1 inch Forstner bit from this set: INTOO Forstner Bit Set 16 pcs Wood Drill bit Set
- Saw out excess from above cut and sand the MDF template.
- Using the above router and flush trim bits, transfer the template onto your actual rail boards.
- Put a roundover on all edges of rail boards. I used this 1/8 inch roundover bit.
- Sand rail boards.
- Cut the dado in the rail boards. I used a router with the Bosch Deluxe Router Edge Guide and the Freud 1/4” (Dia.) Double Flute Straight Bit with 1/4” Shank router bit.
- Put some finish on the plywood. I used 3 coats of Krylon K05515007 COLORmaxx Acrylic Clear Finish for Indoor/Outdoor Use, Gloss Crystal Clear.
- Join the boards and plywood with 1 1/4 inch screws. First drill a pilot hole for each screw, then use a small Forstner bit from the above set to make a counter sink hole for the screw head. Then drive in the screws.
Explore more like this
Lessons learned building a DIY Pikler Triangle
Join me on my journey building a Pikler Triangle from scratch. I followed a great guide, but there are some modifications that I made and a few things that I...
Comments