Lessons learned building a DIY Pikler Triangle

Join me on my journey building a Pikler Triangle from scratch. I followed a great guide, but there are some modifications that I made and a few things that I would do differently
Summary
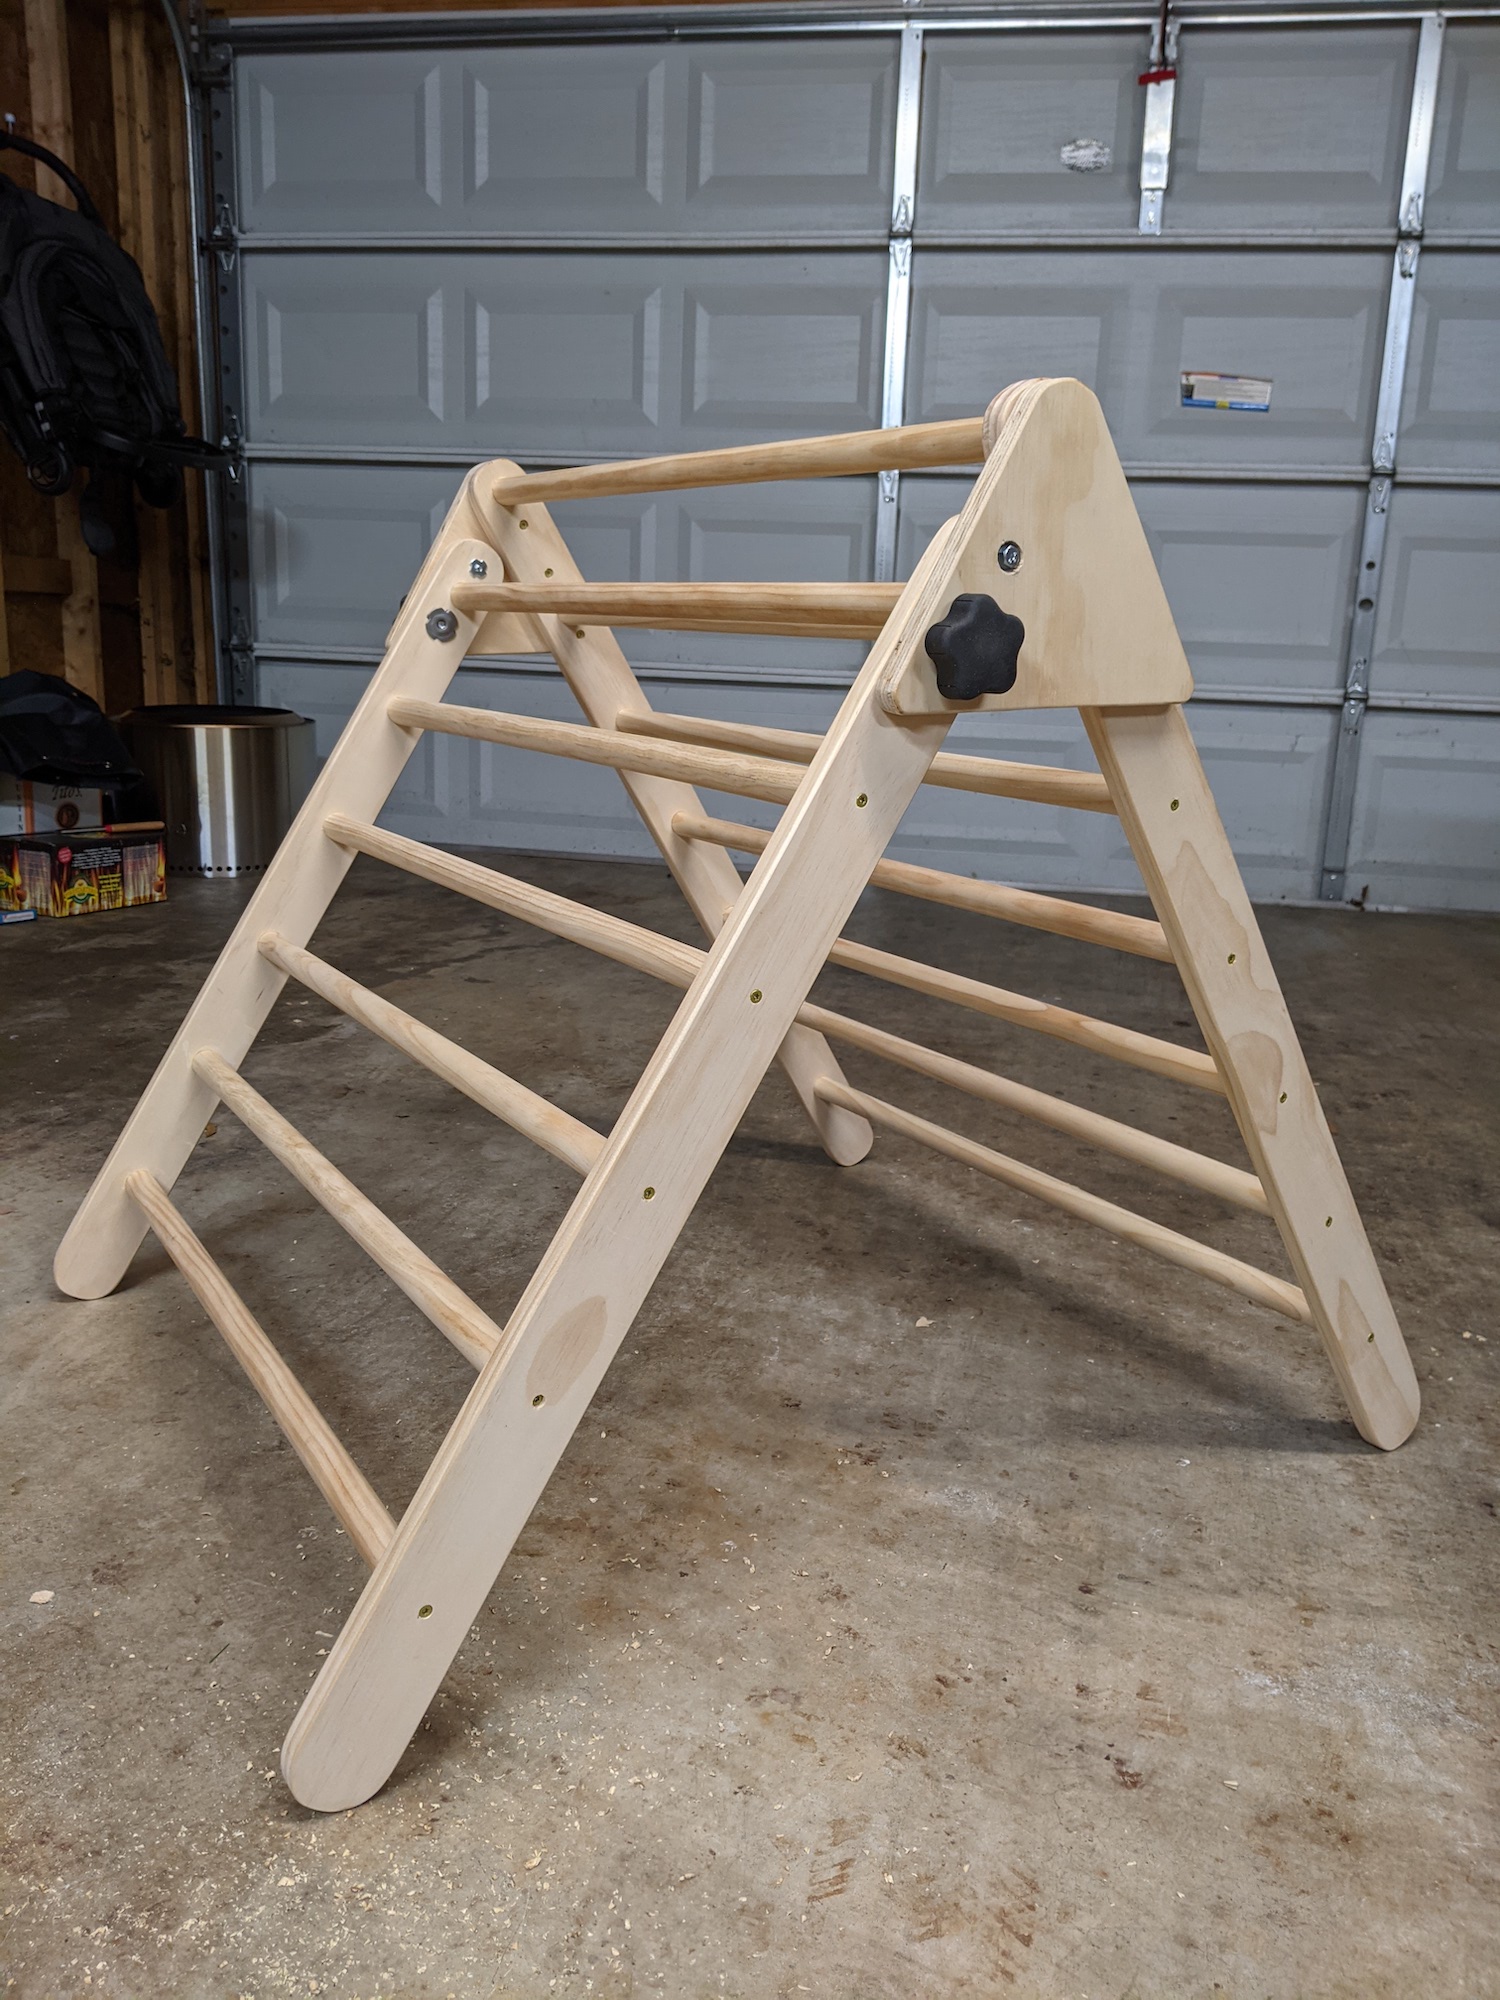
Building a Pikler Triangle
I enjoyed building the Pikler Triangle. It took me around 8 hours total, but I did use this project as an excuse to buy some new tools and try a few new things. This was the first project that I used a router on (more on that below) and the first project that I used a random orbital sander on too.
I followed the instructions from Montessori In Real Life. They were very helpful and detailed. I made a few modifications and learned a few things that I will discuss here.
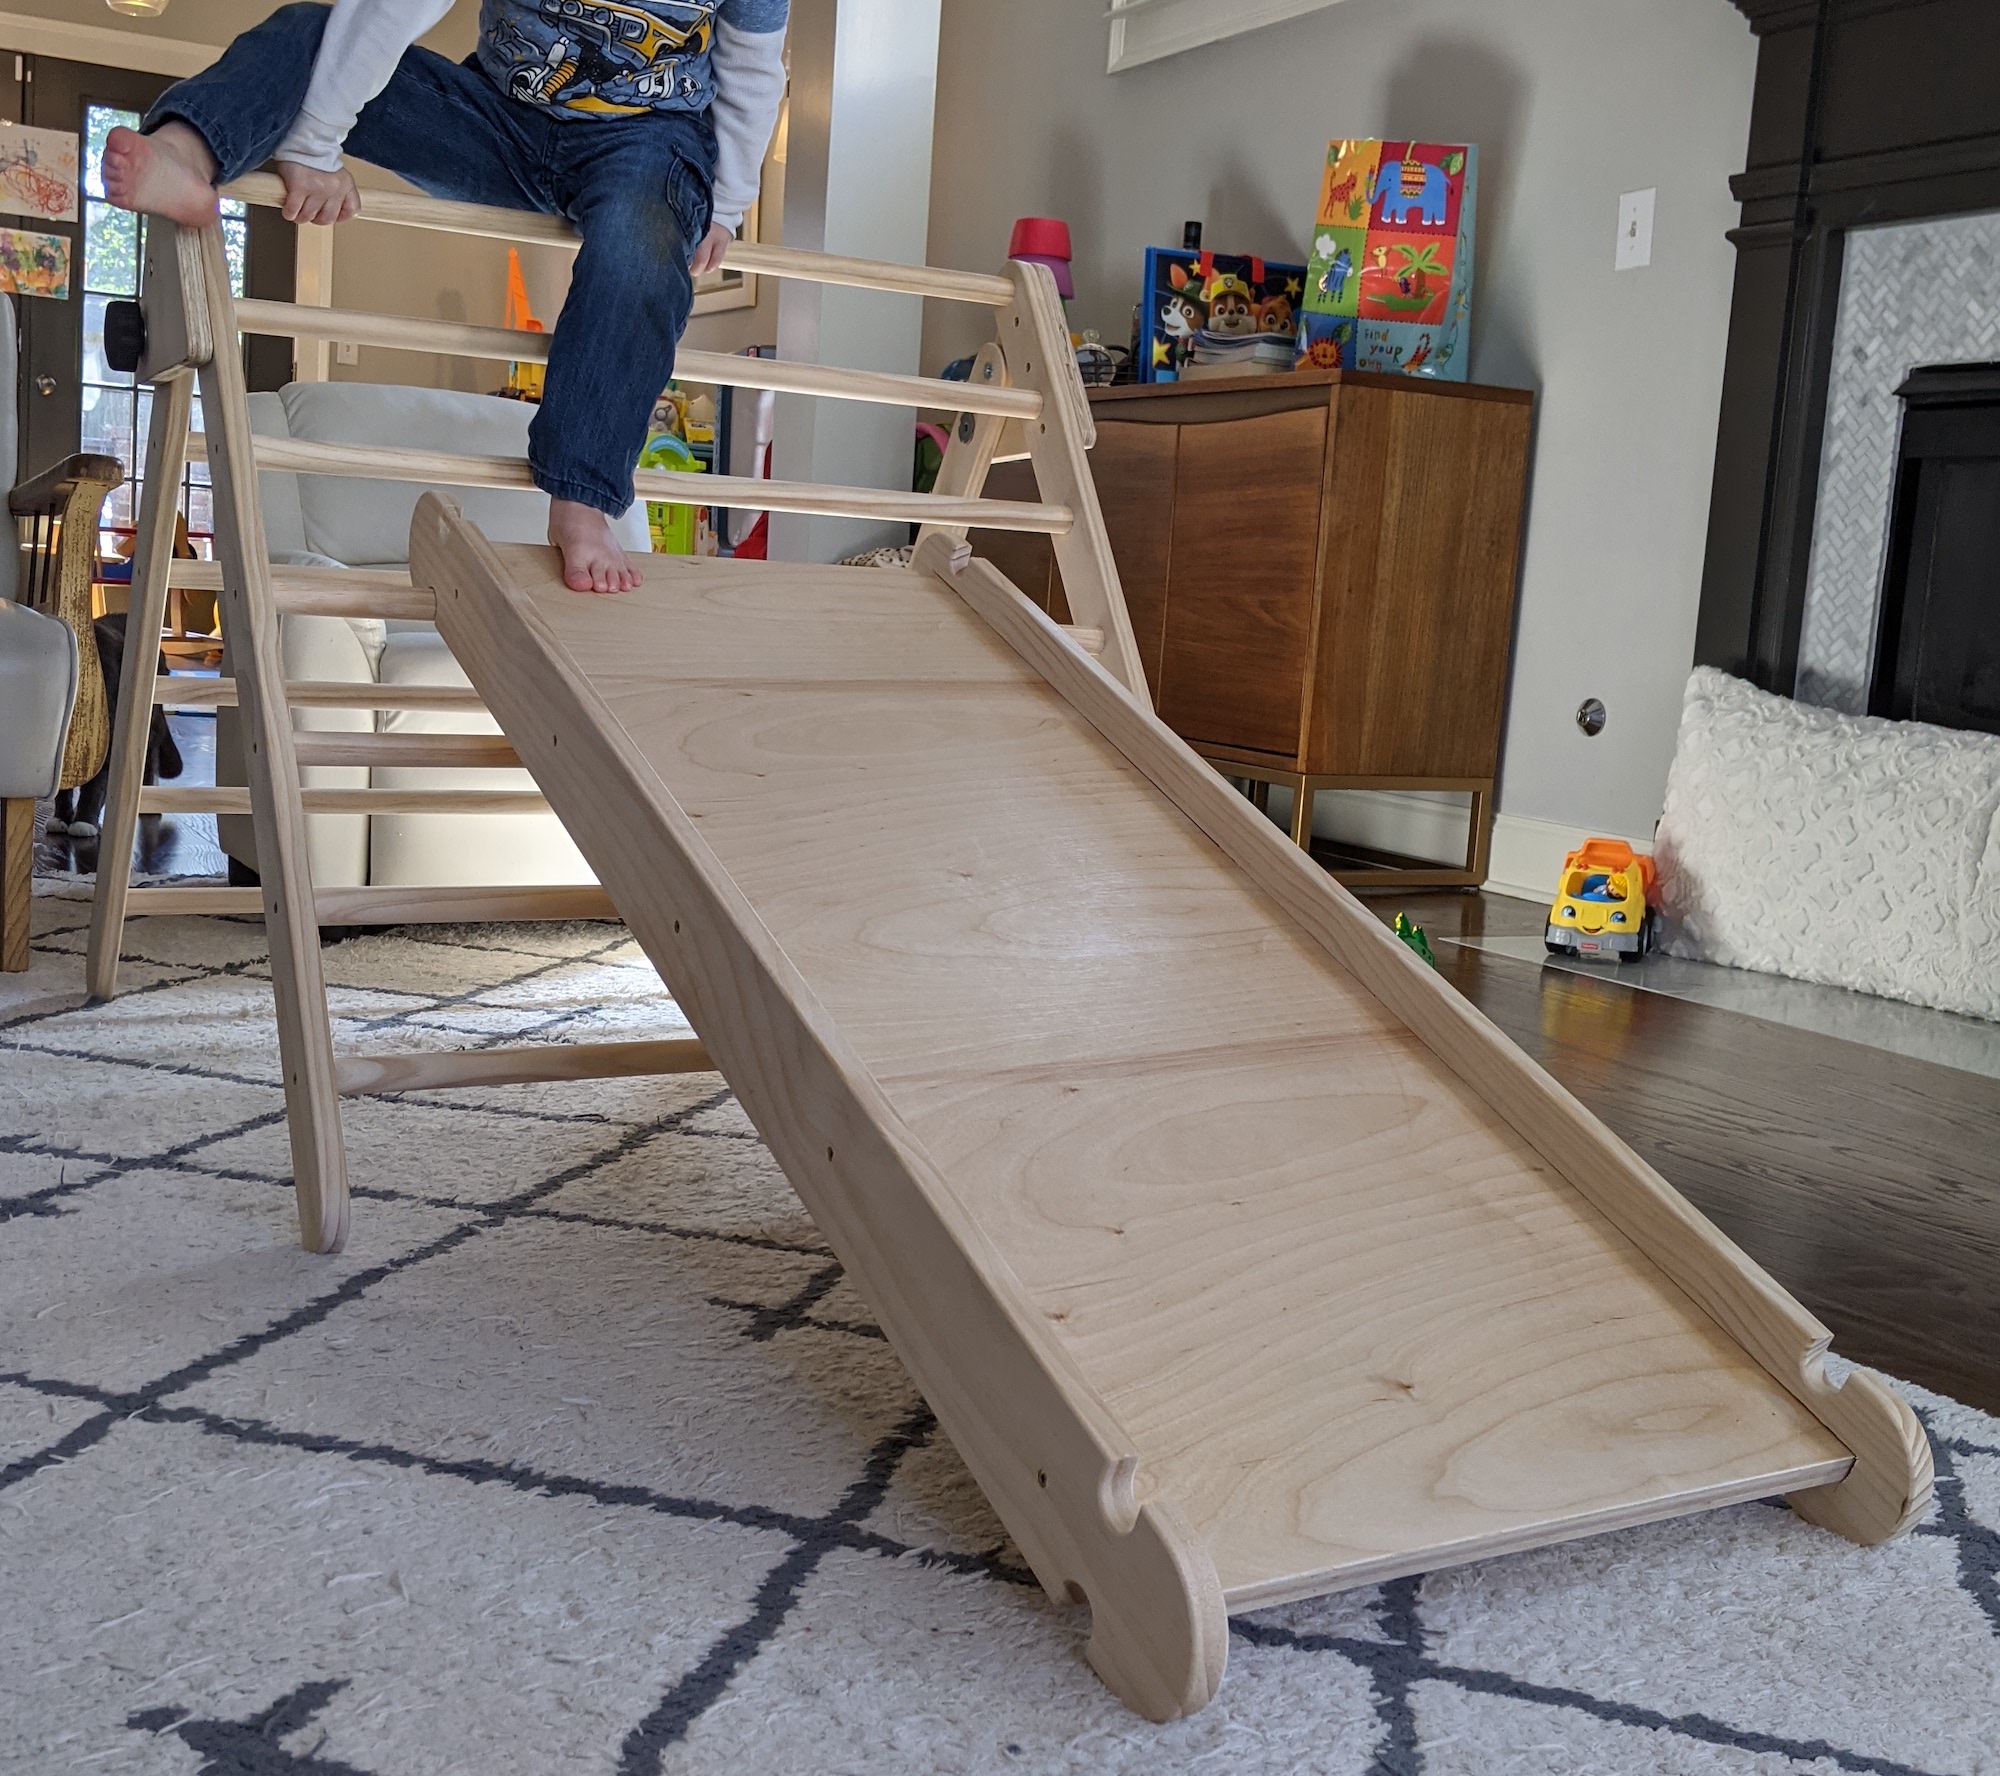
In the end, my kids are still warming up to the triangle. My 3.5 year old likes it. My 11 month old can climb a little. Our friends have one of these and my 11 month old loves the slide attachment they have. Building the slide is my next project.
Materials List
I read a lot of tutorials and watched a lot of videos about building a Pikler Triangle. Nobody links to the actual wood and hardware that they used. I had a hard time figuring out what kind of bolts I would need, but I found some that are excellent. Here are the exact materials that I used.
- 1/4 in.-20 x 1-1/2 in. Zinc Plated Hex Bolt - I used this bolt for the hinge part of the triangle. You need 2 bolts. One for each side.
- 1/4 in.-20 Zinc Plated Tee Nut - T-nut for the other side of the above bolts.
- 1/4 in. Zinc Flat Washer - Washer for the above bolts
- Comfort-Grip Plastic Five Arm Knob with 5/16”-18 Thread 1-1/2” Long Stud, 2-1/4” Wide Head - Star knobs to hand tighten and loose the bolt that secures the triangle from folding. These are really nice. Comfortable. Slightly squishy. I highly recommend them.
-
Steel Tee Nut Inserts, 5/16”-18 Size, 0.688” Installed Length, 1-1/4” Flange Diameter, Packs of 10 - T-nuts for the above star knobs.
- Power Pro #8 x 1-1/4” Wood Screws - Screws to hold the dowels in place. Also used for the stationary legs to connect to the triangles.
- 1 in. x 3 in. x 6 ft. Select Pine Board - Board used for the legs of the triangle. You need 2 but I bought 3 in case I made a mistake.
- Birch Plywood 3/4 in. x 2 ft. x 4 ft - Plywood for the two triangle pieces.
- 1” Wood Dowels - These are 6 feet long. I bought 7 and cut them to size.
Tools Used
- Bosch 1617EVSPK Wood Router
- Freud 1/8” Radius Rounding Over Bit with 1/4” Shank
- INTOO Forstner Bit Set 16 pcs Wood Drill bit Set
- WEN 10236F2 Quick-Adjust 36-Inch Steel Bar Clamps
- IRWIN QUICK-GRIP Clamps Set, 8-Piece
- Bosch ROS20VSC Palm Sander
- Bosch SR5R000 6-Piece Assortment 5 In. 8 Hole Hook-And-Loop Sanding Discs
- Swanson Tool CG100 Cutting Guide 100-Inch - To rip down the plywood with my circular saw
Glue Up
I tried to be fancy and not have screws running down the outside of my legs. I wanted to use glue instead of screws. I drilled the 1 inch holes for each dowel with my Forstner bit. Then, filled the wholes with glue, put the legs in, and clamped the legs together. I let the legs dry over night.
When I returned in the morning, the legs were warped. Putting the triangle together, it wouldn’t even sit flat. I was worried that I would have to start over. Luckily I was able to remove the legs and use screws to hold them together. Once I did that, they came out surprisingly straight.
The screws forced the dowels to sit all the way into the holes. I am sure it’s possible to do that with glue but I was not able to. The screws don’t look that bad anyway.
If I did it again, I would use both glue and screws. You can twist some of my dowels a little in the triangle and the glue would make it feel more secure.
Also, the instructions that I followed recommended making holes for the dowels that are larger than 1 inch. I didn’t have a problem getting my 1 inch dowels into the 1 inch holes. It wasn’t easy, but I took my time and got it all lined up. I also used a rubber mallet some to ensure that the dowels were seated correctly.
Triangle Angles
Following the instructions, I used my miter saw to create the two triangle pieces. In the end, they came out OK, but I made them shorter than I intended too. I think I should have had a sacrificial piece of wood to offset the work piece a little. Or taken more time to line it up. The first angled cut from the miter saw was too far forward and I ended up cutting more off than I wanted to.
I did but both triangle pieces at the same time (on top of each other) so they are exactly the same and it came out OK. Definitely cut them both on top of each other.
Corner Radius
The rounded corners on my legs and triangle pieces are OK, but I can tell that they aren’t perfect. This is the kind of thing that nobody else would notice but I do.
I used a lid to some kind of bottle to create the rounded corners. I actually bought this compass set before starting the work. I am not sure why I didn’t use it to make the corners.
The random orbital sander really helped to smooth the rounded corners out, but the angles are just slightly off. I did stack 2 legs on top of each other and sand them together. That helped to make it nice and smooth.
Drilling
One of my star knobs isn’t lined up correctly. It’s just slightly off, but you have to really fiddle with it to get it to line up with the T-nut.
I do not have a drill press nor do I intend on getting one. I have already purchased the Big Gator Tools STD1000DGNP V-Drill Guide which I will use next when I build the slide. This tool will help to line up the drilled holes so that they are perfectly straight.
Nice Touches
There are a few things I did that make this triangle seem closer to professionally done. DO THESE. They both make a big difference.
First, I counter sunk every screw + bolt. There is nothing sticking out past the wood and there are no sharp edges. I used the INTOO Forstner Bit Set 16 pcs Wood Drill bit Set to do this and they worked really nicely. I didn’t want to spend a ton of money on Forstner bits (they can get pricy). These worked well for me.
Second, I got a router for this project and put a round over on every single edge. I love how this round over turned out and strongly recommend it. I splurged a bit on the router and got one that I plan to use forever. I got the Bosch 1617EVSPK Wood Router. I actually wasn’t sure that I would use the plunge feature, but on the slide, I am planning to use it. I also did not get the cheapest round over bit but certainly not the most expensive. I got the Freud 1/8” Radius Rounding Over Bit with 1/4” Shank.
Do both of these things and your triangle will look much more professional.
Next
Up next, I am really excited to build the slide/rock wall. I was planning to follow the instructions linked above to do that. Here’s the thing though. Our friends bought a $200 slide from Amazon and it looks professionally done. Now it’s my challenge to recreate that. I plan to use my router and make a template to do some interesting cuts. Also making a dado to seat the side rails onto the slide. Should be a lot of fun. Stay tuned for an article on that when I complete the slide.
Explore more like this
DIY Pikler Triangle Slide - How to build a $200 slide from scratch
Building a Pikler Triangle Slide I built a Pikler Triangle and I was happy with it (see my previous article on how I built the Pikler Triangle). Deep down, what...
Comments